
Raspberry Pi Buying Guide 2026: Which Model Should You Choose?
So, you’ve decided to purchase a Raspberry Pi.

(from imgflip)
Wise decision! I wrote this post to help you identify which model is best for you, and to outline the essential accessories versus the “nice-to-haves,” depending on your projects and budget.
Before we start
Given the wide range of devices developed by the Raspberry Pi Foundation, I will focus specifically on the most recent models oriented towards desktop or server usage. In other words, I will only consider the Raspberry Pi 4, Pi 400, Pi 5, and the Raspberry Pi Zero 2 W.
The reason is simple: older models are now significantly behind in terms of performance or rely on outdated architecture. For instance, the original Pi and Pi 2 are often incompatible with modern Docker images that no longer support their older processor architecture (ARMv6/v7) or require 32-bit OS versions.
Disclaimer: I have included plenty of links to the products mentioned in this article. None of them are sponsored. I am sharing them solely to make things easier for you if you are interested in purchasing any of these items.
So, which model should you choose for your project?
The “Compact & Efficient” Choice: Raspberry Pi Zero 2 W
This is the go-to board for embedded projects. Choose this one if space is tight (DIY camera, handheld console like a Gameboy) or if you need to run on battery power.
- Warning: With only 512MB of RAM, it is designed for command-line use (lightweight servers, Python scripts). Forget about smooth web browsing on this one; it’s best used in “headless” mode.
👨💻 My Personal Setup: I use my Raspberry Pi Zero 2 W for two things:
Ansible Node: It runs Ansible commands to deploy updates or administrative tasks to the rest of my servers.
Prototyping: I use the GPIO pins to build prototypes (e.g., an alarm system with LEDs, buzzers, and a button, driven by Home Assistant events triggered by camera motion detection).
The “Best Value” Choice: Raspberry Pi 4
Still very much in the race, this is the standard. It is capable of doing it all: desktop use, 4K media center, or a full home automation server. If you are on a tight budget, this is the most rational choice.
👨💻 My Personal Setup: I use my Raspberry Pi 4 to run my observability stack: Prometheus, Blackbox, Grafana, Alertmanager, etc.
Note: The Raspberry Pi 400 is essentially a Pi 4 built into a keyboard. Great for kids or a tidy desktop, but harder to use for DIY projects.
The “Performance & Future-Proof” Choice: Raspberry Pi 5
It is 2 to 3 times faster than the Pi 4. It is essential if you want:
-
Heavy emulation (PS2, GameCube, Wii).
-
Intensive file servers (thanks to its PCIe port for ultra-fast NVMe SSDs).
-
A desktop experience as smooth as a real PC.
👨💻 My Personal Setup: I have two distinct uses for the Pi 5:
Storage Cluster: I use three of them to form an S3 cluster using Garage.
Docker Host: I use another one to run various services via Docker (Plausible, Affine, Jellyfin, etc.).
And what about RAM (2, 4, 8, or 16GB)?
For the Pi Zero 2 W, the question is easy: it only exists with 512MB. For the Pi 4, it comes in 2, 4, or 8GB. For the Pi 5, you have the choice of 4, 8, or 16GB.
The choice will, once again, depend on your needs and budget:
-
2 GB: Strictly for simple headless servers (DNS, ad-blockers like Pi-hole).
-
4 GB (Recommended): The sweet spot. Sufficient for desktop use and the vast majority of self-hosted services (Home Assistant, Plex).
-
8 GB and up: For power users. Necessary for heavy services (Immich, Nextcloud with multiple users), virtualization, or running many applications simultaneously via Docker.
Displays and Input (Optional)
Similar to the choice of the Raspberry Pi itself, this section is highly influenced by your plans for the device.
If you plan to use your Raspberry Pi exclusively remotely (via SSH, VNC, or Raspberry Pi Connect), this section is purely optional and you can jump to the next one. Otherwise, if you plan to use it as a desktop computer or a retro-gaming console, the following items are must-haves.
Displays
-
Standard Option: A computer monitor with an HDMI input, or a TV.
-
Official Option: There are specific Raspberry Pi displays, like the Raspberry Pi Touch Display.
-
The “MacGyver” Option: Redirecting the HDMI output to a smartphone or tablet via a Video Capture Card (HDMI-to-USB dongle).
My take: I tested this using a cheap HDMI capture card and an Android app (“USB Camera”). It works, but I strongly advise against it. It is unreliable (doesn’t work on iPhones/iPads, hit-or-miss on Android), and the setup is fragile (too many adapters daisy-chained together). Stick to a real screen for initial setup.
Connectivity: The HDMI Jungle
Be careful here, as not all Pis share the same port!
-
Raspberry Pi 4, 400, and 5: These use Micro-HDMI. You need a specific Micro-HDMI to HDMI cable (or an adapter).
-
Raspberry Pi Zero / Zero 2 W: These use Mini-HDMI. This is smaller than standard HDMI, but larger than Micro. You will need an adapter.
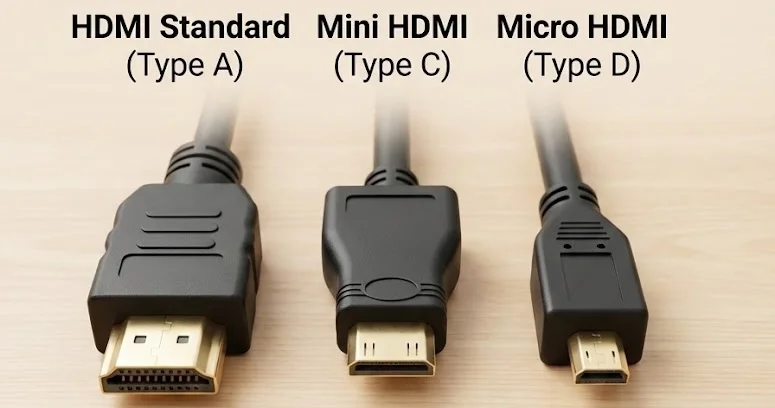 The different formats of HDMI
Input devices (Keyboard & Mouse)
A mouse is useless if you chose a headless system, but I recommend having at least one wired keyboard on hand for troubleshooting.
Two important warnings:
-
Avoid RGB/Backlit keyboards: They consume significant power, which can cause voltage drops on the Raspberry Pi. Simple office keyboards are best.
-
The Pi Zero 2 W Trap: This model has very few ports (Micro-USB). You absolutely need a Micro-USB OTG (On-The-Go) adapter to plug in a standard USB keyboard. Without this cheap little cable, you cannot plug anything in!
My take: I almost never interact directly with a Raspberry Pi, relying mostly on SSH. However, for the rare cases where it happened (help, I broke my SSH config, trashed my authorized_keys, stopped the SSH daemon, or my WireGuard config went wild…), I was extremely pleased to use my poor quality but cheap tiny keyboard. It allowed me to type the few commands that saved me from these situations. It’s useless most of the time, except for those moments when it becomes the most useful thing in the world.
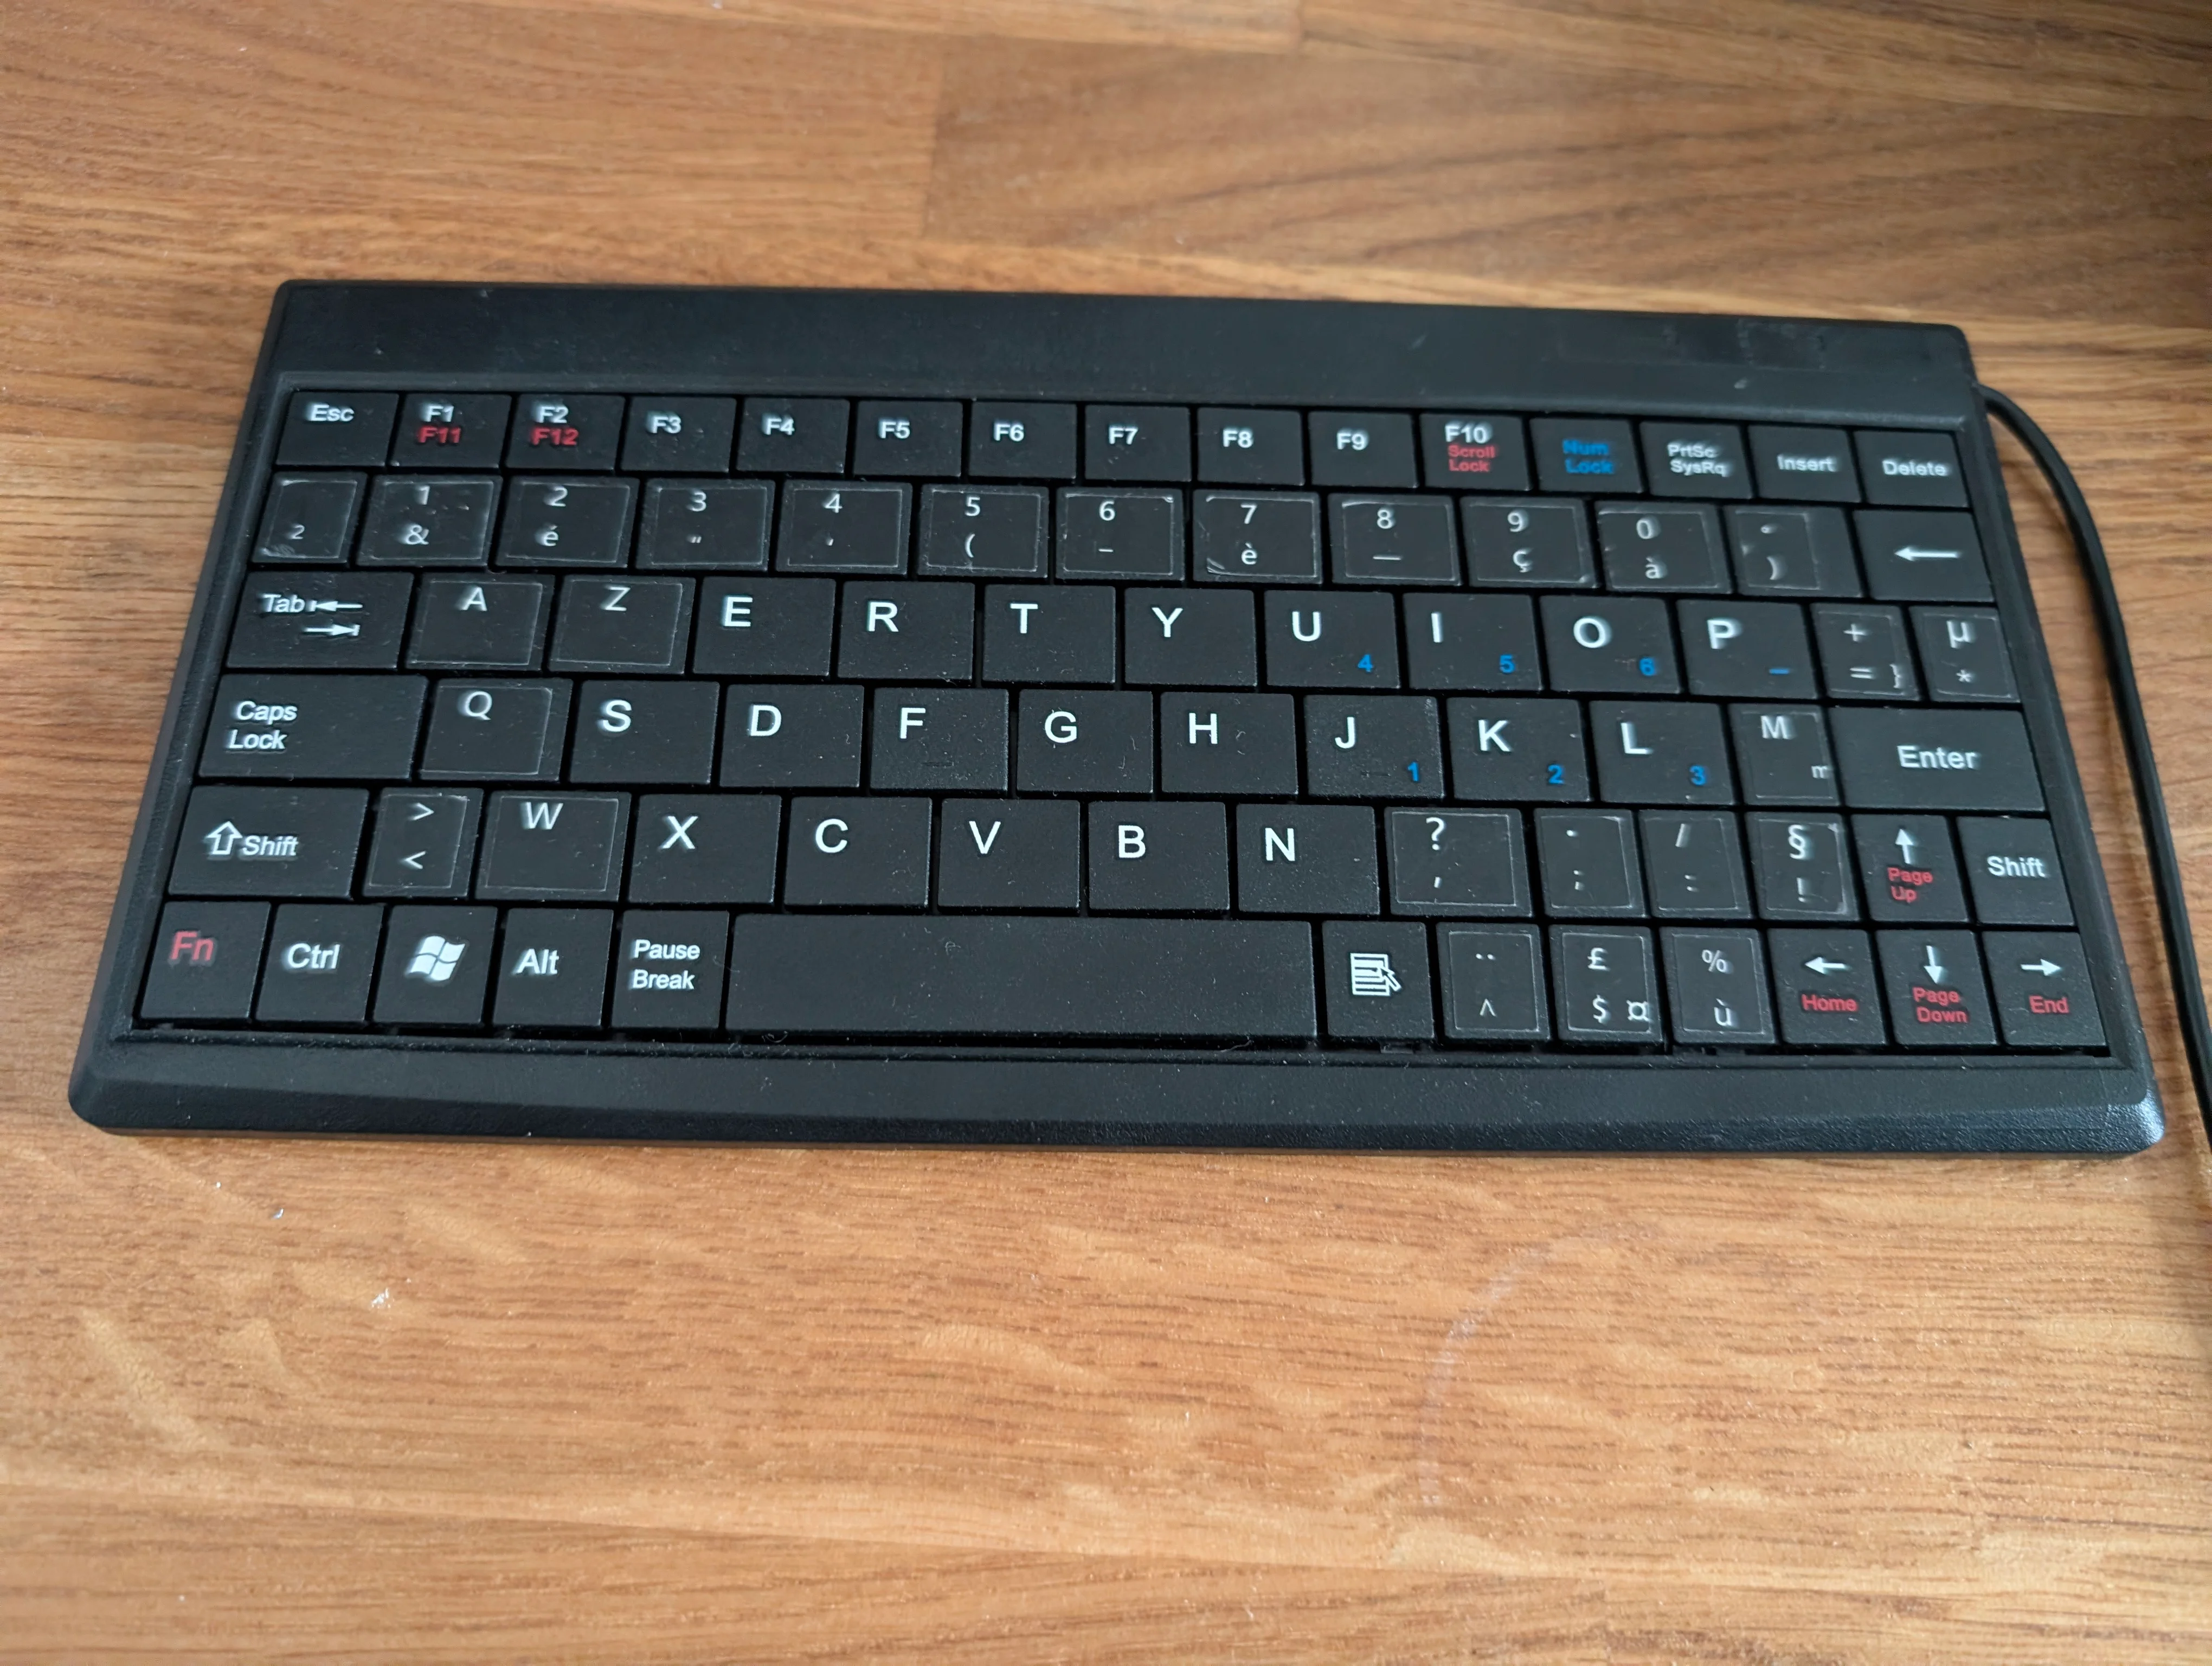 My lil’ keyboard. Love it!
The Power Supply (Vital)
You generally cannot simply use an old phone charger to power a Raspberry Pi. They require stable voltage and higher amperage (typically 5.1V / 3A for the Pi 4/5).
Using an inappropriate power supply can cause the device to refuse to start, crash randomly, or corrupt the SD card. Trying to save money here is generally a bad strategy. Especially if you plan to plug in power-hungry USB devices (like hard drives).
- Raspberry Pi 4, 400, and 5: Require a USB-C power supply.
- Raspberry Pi Zero 2 W (and older models): Require a Micro-USB power supply.
I recommend you to have a look on the official Rapsberry Pi power supply (either on the official store, or from 1 of the various reseller).
Hint: You already have some power supplies at home and wonder if it’s worth investing in new ones? Here are two ways to check:
- There are USB-C adapters with LED screens that display power, volts, and amperes. This is useful to know if your power supply matches the requirements.
In case it helps, I purchased mine on Amazon.fr (yes, I’m French :) ).
- Alternatively, on Raspberry Pi OS, if you are successfully logged in and have access to a shell session, type the command:
vcgencmd get_throttledIf the command returns throttled=0x0, you are good to go! If you get a different answer, then you have a power problem!
The Storage (SD Card)
All models require a MicroSD card to store the operating system. While we used to simply look for the A2 Application Class rating, the landscape changed in late 2024. Recent benchmarks reveal a new performance leader specifically optimized for the Raspberry Pi hardware.
Here are the 4 categories to consider based on the latest 2025 data:
-
The New Performance King: Official Raspberry Pi SD Card (64GB or higher). According to extensive benchmarks by bret.dk, these cards unlock “Command Queuing,” a feature that drastically improves random write speeds (up to 3x faster than standard cards).
-
Warning: Avoid the 32GB model, as benchmarks show it is significantly slower.
-
Budget Note: In Europe, these are often cheaper than competitors, making them the best choice for both price and performance.
-
-
The “Classic” Alternatives: SanDisk Extreme or SanDisk Extreme Pro. If the official cards are out of stock, these remain the gold standard. They are reliable, widely available, and perform excellently, even if they don’t quite match the specific I/O optimization of the new official cards.
-
The Reliability Choice: Samsung PRO Endurance or SanDisk Max Endurance. Best for 24/7 servers (like Home Assistant) or surveillance cameras. While the new official cards show promise, they haven’t been tested for long-term endurance yet. For critical setups, stick to these cards designed to survive continuous writing for years. (Note: The cheaper SanDisk High Endurance is also a decent alternative if budget is tight).
-
The Budget Backup: Amazon Basics MicroSDXC. If the official cards are unavailable in your region, avoid the temptation of the cheapest generic cards. Before the official cards arrived, Amazon Basics were the benchmark leaders for value. They offer surprisingly good random I/O performance (A2 rated) for a very low price, significantly outperforming the older SanDisk Ultra series for running an operating system.
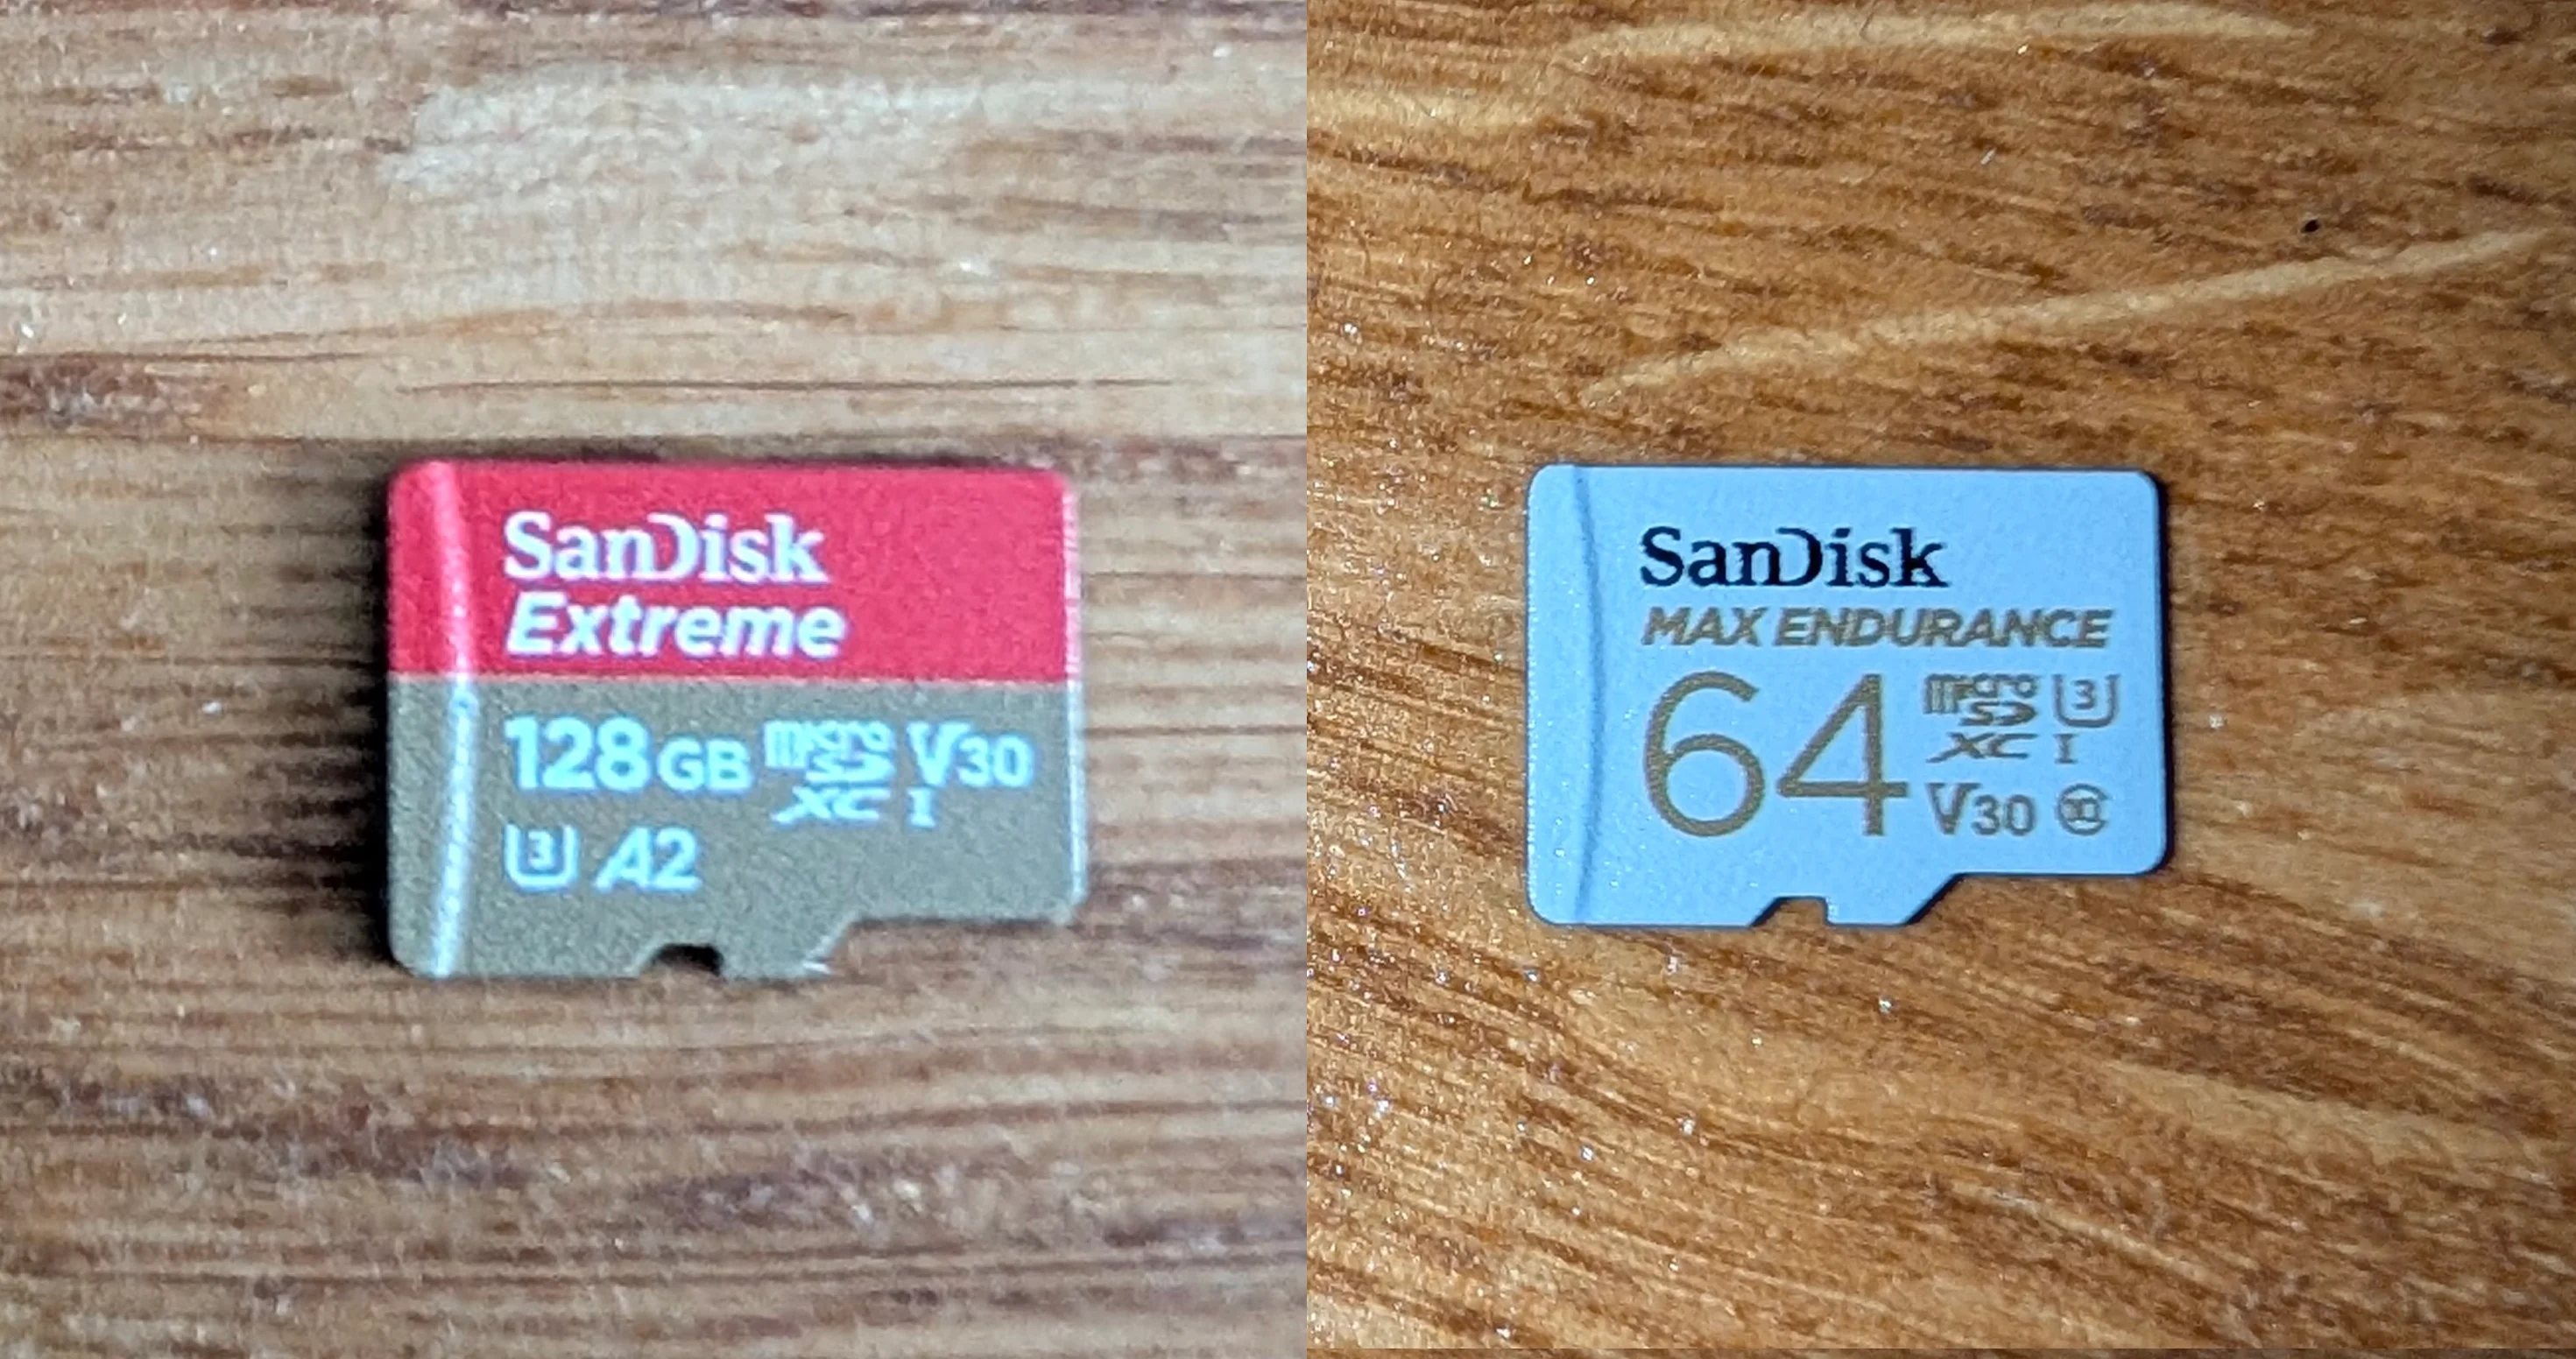
Sandisk extreme and max endurance. 2 great choices for your Raspberry Pi
Source: For a deep dive into the performance data, check out bret.dk’s 2025 MicroSD Card Benchmark.
Network Connectivity
Connectivity varies greatly between models:
-
Raspberry Pi 5, 4, 400, and 3B+: These are the most versatile. They include both Gigabit Ethernet (cable) and Dual-band Wi-Fi (2.4GHz & 5GHz).
-
Raspberry Pi Zero 2 W: To keep the size small, it only has Wi-Fi, and specifically Wi-Fi 4 (2.4GHz only). It connects easily to home networks but won’t reach fiber speeds.
Pro Tip: Given the performance limits of Wi-Fi 4, you can invest in an “Ethernet HAT” that adds an Ethernet connection to a Raspberry Pi Zero 2 W. I purchased this one.
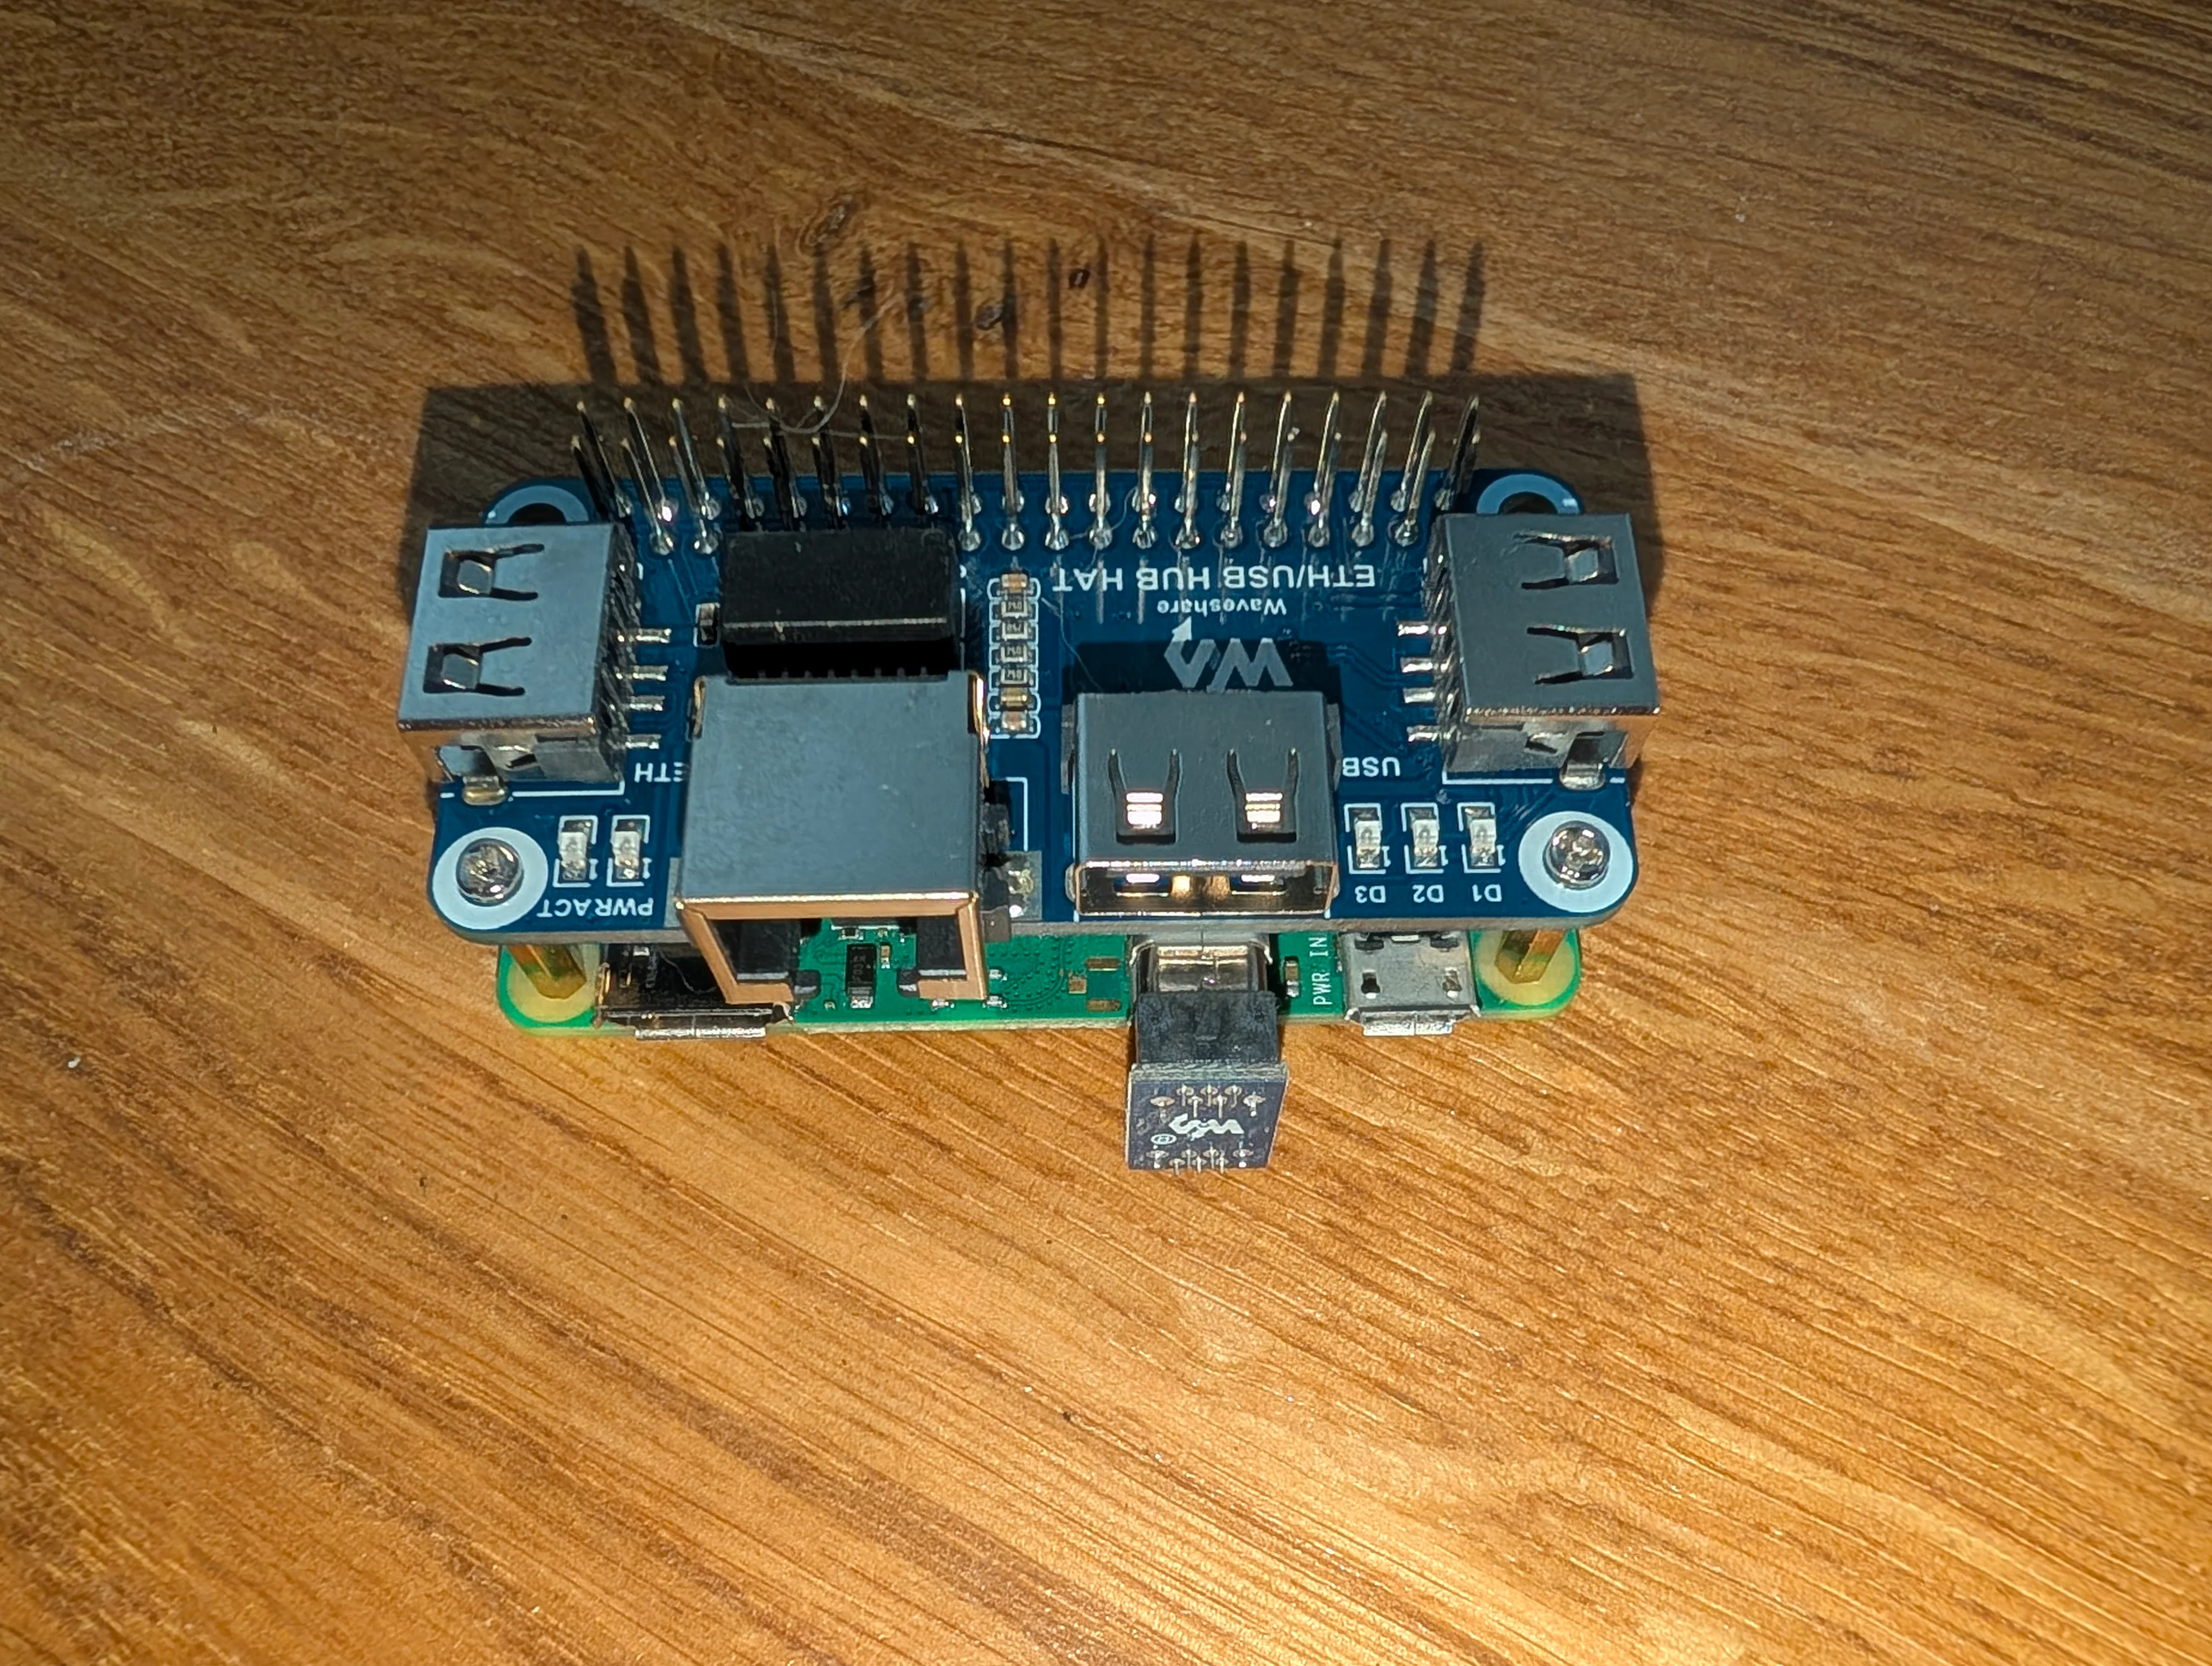
My Pi Zero 2w with an Ethernet HAT installed on top of it
Cooling and Cases
Do you need a fan? That depends on the model.
-
Raspberry Pi 5: It runs hot. Active cooling is mandatory. I highly recommend the official “Active Cooler” (a radiator + fan combo) that clips directly onto the board.
-
Raspberry Pi 4: A passive heatsink is recommended. If you use a case, make sure it has a fan or is made of metal (like the FLIRC or Argon One cases) to dissipate heat.
-
Raspberry Pi Zero 2 W: Usually doesn’t require specific cooling unless enclosed in a tiny, airtight box.
Don’t forget the thermal paste: Most coolers or cases come with “thermal pads” (little soft squares). Don’t throw them away! They must be placed between the processor and the heatsink to transfer heat effectively.
For cases, there are countless options. Here are two criteria to consider:
-
Material: Metal (aluminum) offers better heat dissipation but feels warmer to the touch. Plastic is cheaper but insulates heat.
-
Height: This depends on whether you want to use a Raspberry Pi with a HAT (expansion board) or not.
Just keep in mind that each model has its own specificity, so you cannot use a Raspberry Pi 4 case for a Raspberry Pi 5, and vice versa.
Beyond the Basics: GPIO & Advanced Projects
There are plenty of accessories, gadgets, or fundamental components depending on the project you desire to construct with your Raspberry Pi. Here are two examples from my own experience:
Exploiting the GPIO
The GPIO (General Purpose Input/Output) consists of the metal pins on the side of the board. They allow your Pi to interact with the physical world.
-
Home Alarm Project: I built a custom alarm circuit using a button, 6 LEDs, and 2 buzzers. Three LEDs indicate the alarm state, while the other three blink alongside the buzzers when the alarm is triggered. I use a REST API to arm/disarm it, controlled by Home Assistant, which gathers motion detection data from my cameras.
-
Notification Display: I used a 2-line LCD display and an LED. When I receive a message, email, or Grafana alert, the message scrolls on the screen, and the LED blinks in a color associated with the message type. I keep it on my desk. It’s geeky and surprisingly useful for getting info out of the corner of your eye during meetings.
Beginner Tip: Interested in trying such projects but feel like a beginner? I recommend checking out Freenove kits. They offer excellent starter packs with tutorials (robots, circuits, etc.).
The “Homelab” Cluster
As mentioned earlier, you can build a cluster of Raspberry Pis to store backups or critical data (photos, admin docs).
- My Setup: I previously built a Ceph cluster distributed across three Raspberry Pi 5s. Each one is equipped with an NVMe SSD HAT. This acts as a distributed file system for a Docker Swarm cluster. I later replaced Ceph with Garage, a distributed object storage service.
If you are interested, here is the shield I bought and the SSD model.
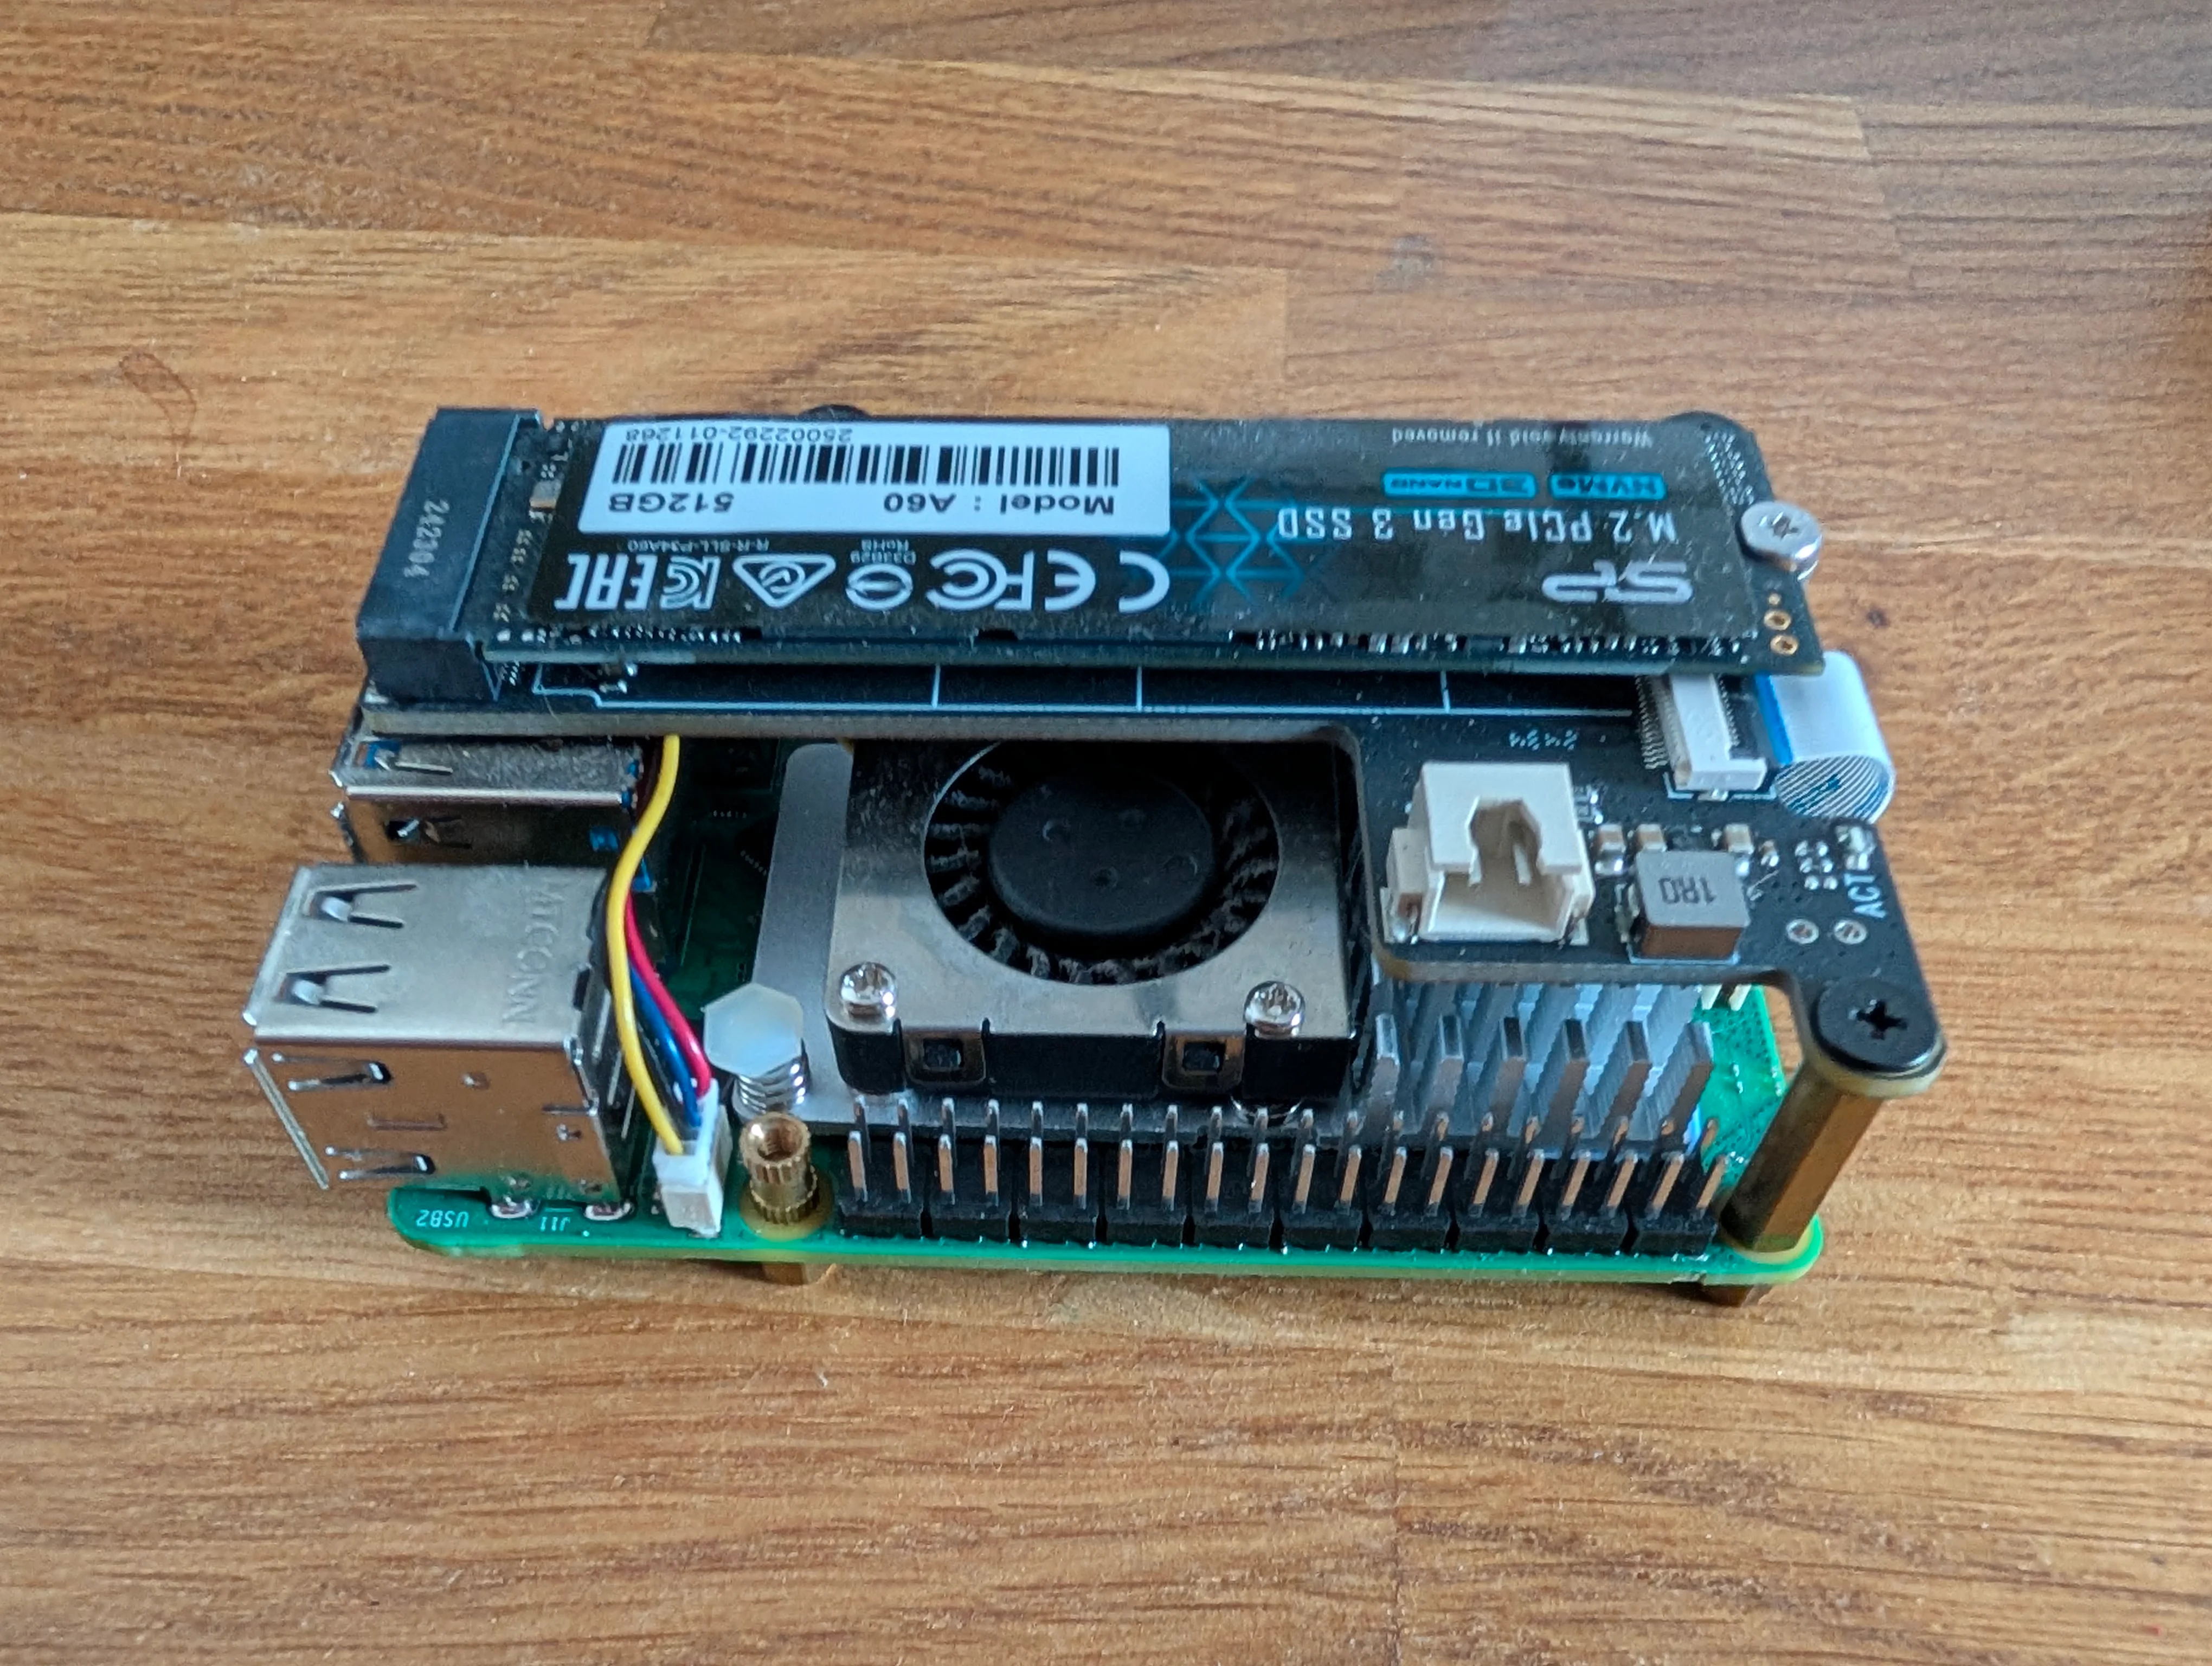
A Raspberry Pi 5 with a PCIe SSD shield, an NVMe SSD, fan, and radiators
The link of the shield I bought here ; the link of the SSD here.
What’s Next? Breathing Life into Your Pi
Congratulations! If you followed this guide, you should now have a clear idea of which Raspberry Pi model suits your needs, along with the right power supply and SD card.
But right now, your brand-new device is essentially just a very cool-looking paperweight.
To make it actually do something, you need to install an Operating System (OS). Whether you want a desktop interface, a media center, or a command-line server, the installation process has changed a lot in recent years.
I am currently writing a dedicated guide on how to set up your Raspberry Pi from scratch in 2025, covering the magic of the Raspberry Pi Imager, how to configure Wi-Fi before the first boot, and the first essential security steps to take.
Stay tuned! The software guide is coming soon.
I recently published a guide on [[how to choose the right Raspberry Pi model based on your project]]. As a direct follow-up, this post focuses on the next logical step: installing an...