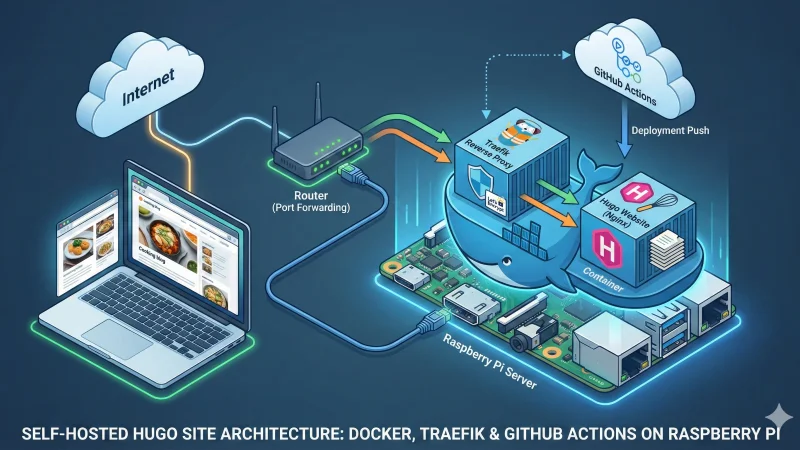
How to Host a Hugo Site on Raspberry Pi with Docker, Traefik, and GitHub Actions
This article provides a comprehensive guide to creating and deploying a website on a local server instance. Using GitHub Actions, you’ll learn how to automatically deploy new versions whenever resources are added. I’ll also explain how to set up Traefik, a reverse proxy that—along with DNS and router configuration—will make your website accessible to the public.
Prerequisites
There are a few prerequisites that won’t be detailed in this article. First, you need a local network with a server instance up and running, and access to this instance (either directly or via SSH). In my case, this is a simple Raspberry Pi.
You should also own a domain name and have access to its DNS records to redirect incoming traffic to your router. Additionally, you need access to your router’s configuration to add port forwarding rules. Your internet provider must have assigned you a static public IP address (if not, look into dynamic DNS services).
You need an existing GitHub account set up for cloning, committing, and pushing to your repositories. Finally, you need Docker installed and running on both your main computer and your server.
Create and push your website
I’ll cover this part briefly since I’ve already written a detailed article on this topic, accessible here. For this tutorial, I chose the example of a cooking blog using the cuisine-book theme by Kien Nguyen-Tuan, which perfectly matches my needs. I created a (private) GitHub repository named “cooking” and cloned it to my development machine.
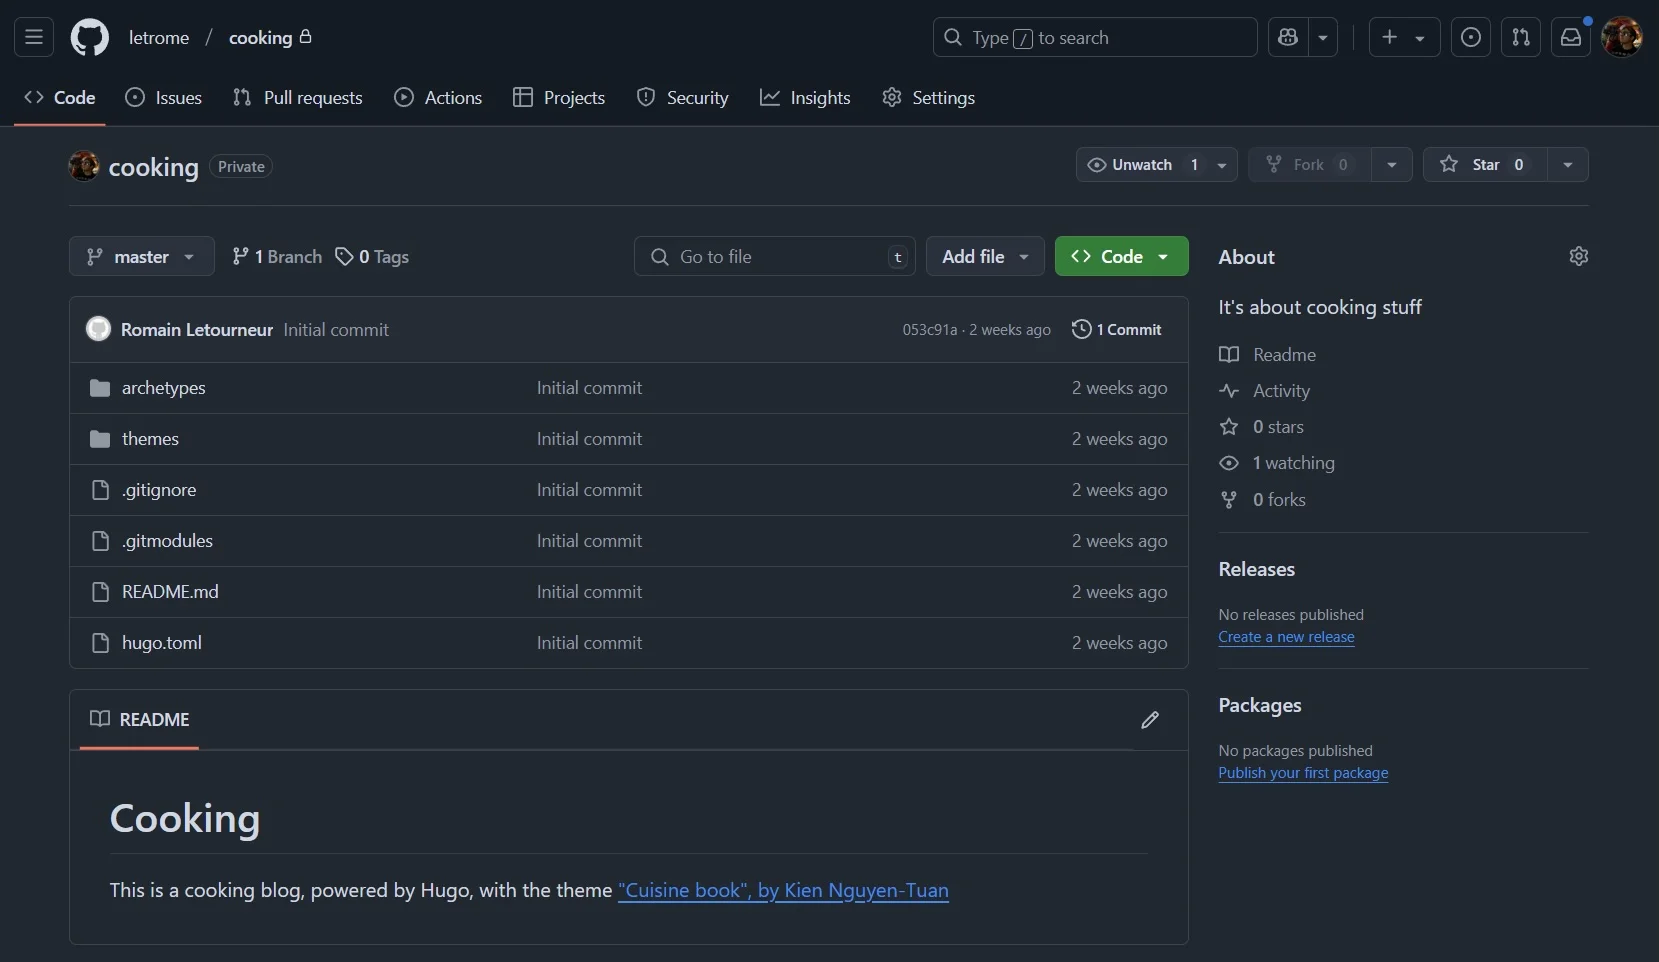 GitHub repository for the website “cooking”
Then, I created a new Hugo website, added this theme, and ran it locally:
git clone https://github.com/letrome/cooking.git
cd cooking
hugo new site cooking
git submodule add https://github.com/ntk148v/hugo-cuisine-book themes/cuisine-book
hugo server --minify --theme cuisine-book
Note: I tested this on macOS and Ubuntu via WSL2, and it worked like a charm! However, you may encounter the following error:
[...]
executing "partials/head.html" at <css>: can't evaluate field Sass in type interface {}
[...]
This is due to a breaking change introduced in recent versions of Hugo. Depending on how up-to-date your template is, you may need to edit the theme to fix it. If this happens, open the file ./themes/cuisine-book/layouts/partials/head.html and replace css.Sass with resources.ToCSS. To verify that your website is running properly, visit the URL shown after executing the last command, typically http://localhost:1313.
 The website, accessible at localhost:1313
You can now commit and push your changes to your GitHub repository.
Dockerize this app
First, let’s create a file named Dockerfile at the root of the project. Here’s the content:
FROM hugomods/hugo AS builder
COPY . /site
WORKDIR /site
RUN hugo --minify --theme cuisine-book --destination /public

FROM nginx:alpine
COPY --from=builder /public /usr/share/nginx/html
EXPOSE 80
Let’s briefly explore what this Dockerfile does. The first block handles website generation. We use hugomods/hugo, a community Docker image for building Hugo websites (line 1). We copy all necessary files into a folder named site (line 2). From this folder (line 3), we launch the generation of the static files (line 4).
The second block serves the website using Nginx. Starting with an Alpine-based Nginx image (line 1), we copy the previously generated files to /usr/share/nginx/html (line 2)—the default directory where Nginx exposes resources. Finally, we specify that port 80 of the Docker container will be exposed.
Adding Docker Compose
To simplify the deployment process and avoid typing long commands, let’s create a docker-compose.yaml file at the root of your repository:
services:
  cooking-app:
    build: .
    image: cooking:latest
    container_name: cooking-container
    ports:
      - "81:80"
    restart: always
Here I have bound port 81 of the host to port 80 of the container. This anticipates our final configuration where Traefik will listen on ports 80 and 443.
Now, you can build and run your website with a single command: docker compose up -d
Open your web browser to test that your website is accessible at http://localhost:81.
The website, accessible at localhost:81
Automate build and deployment using GitHub Actions
This section shows how to use GitHub Actions to automatically deploy updates to your local server (the Raspberry Pi). The process involves three steps: setting up a self-hosted runner, configuring your repository workflow, and verifying the setup.
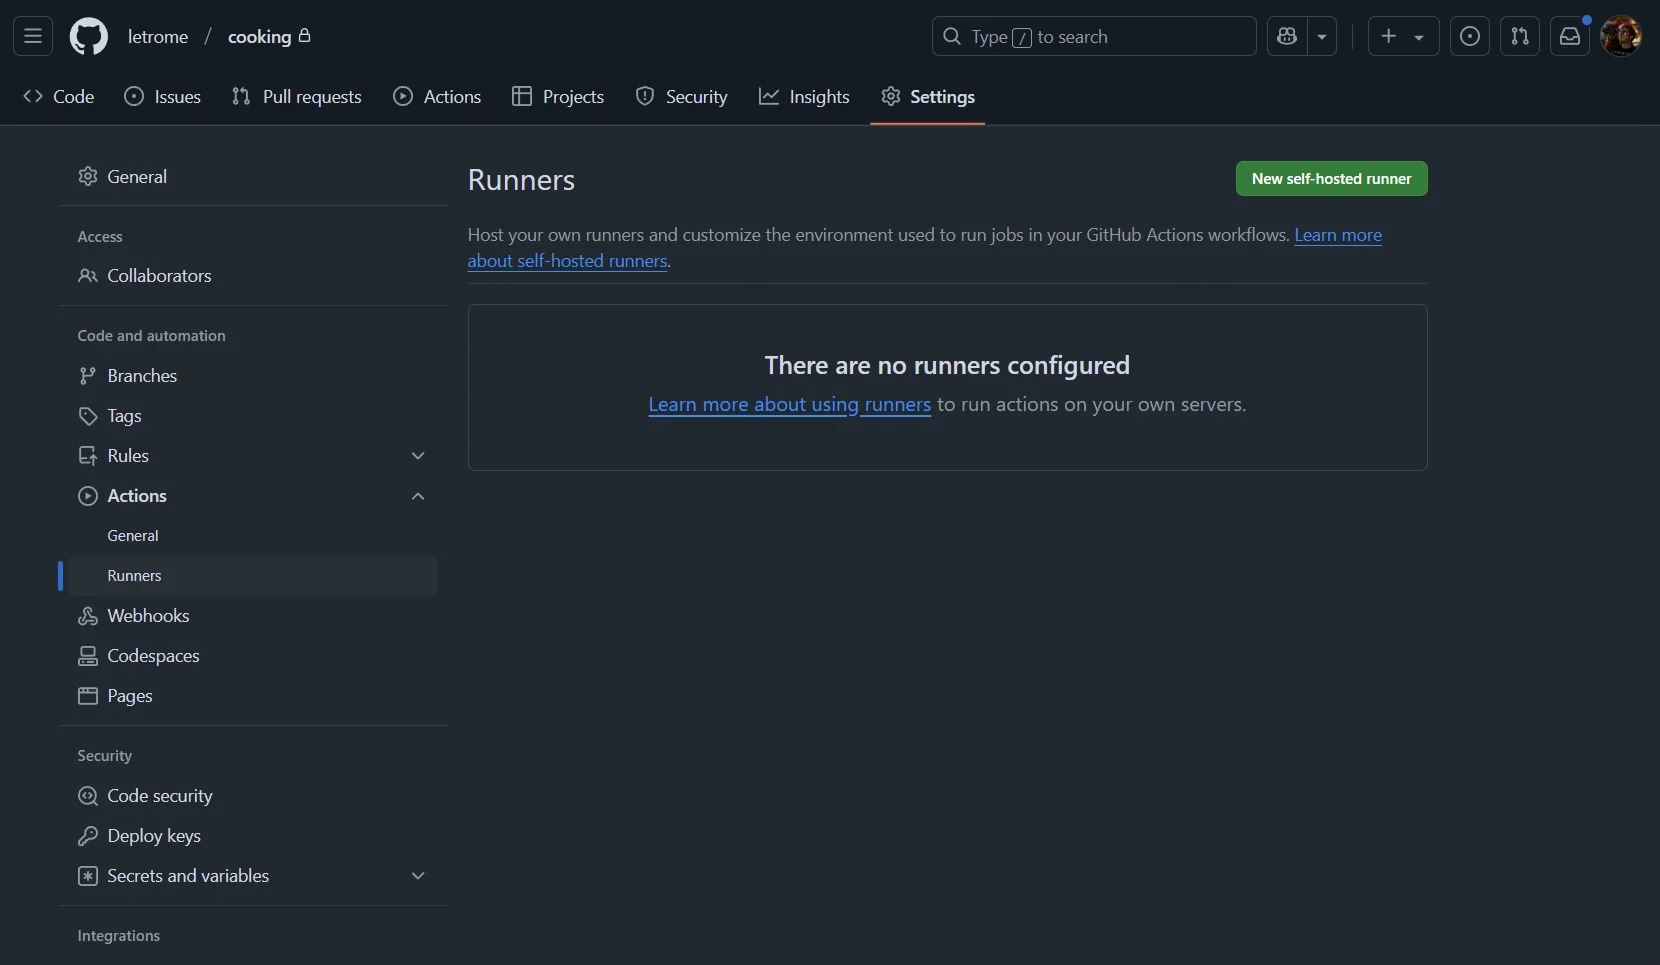
Add the self-hosted runner
On your repository page on github.com, go to Settings. Under the Actions > Runners category in the left sidebar, click the green New self-hosted runner button.
 The “Runners” section on GitHub
Select the runner image and architecture that match your server (typically Linux and ARM64 for a Raspberry Pi). Copy and paste the provided instructions into your server’s terminal.
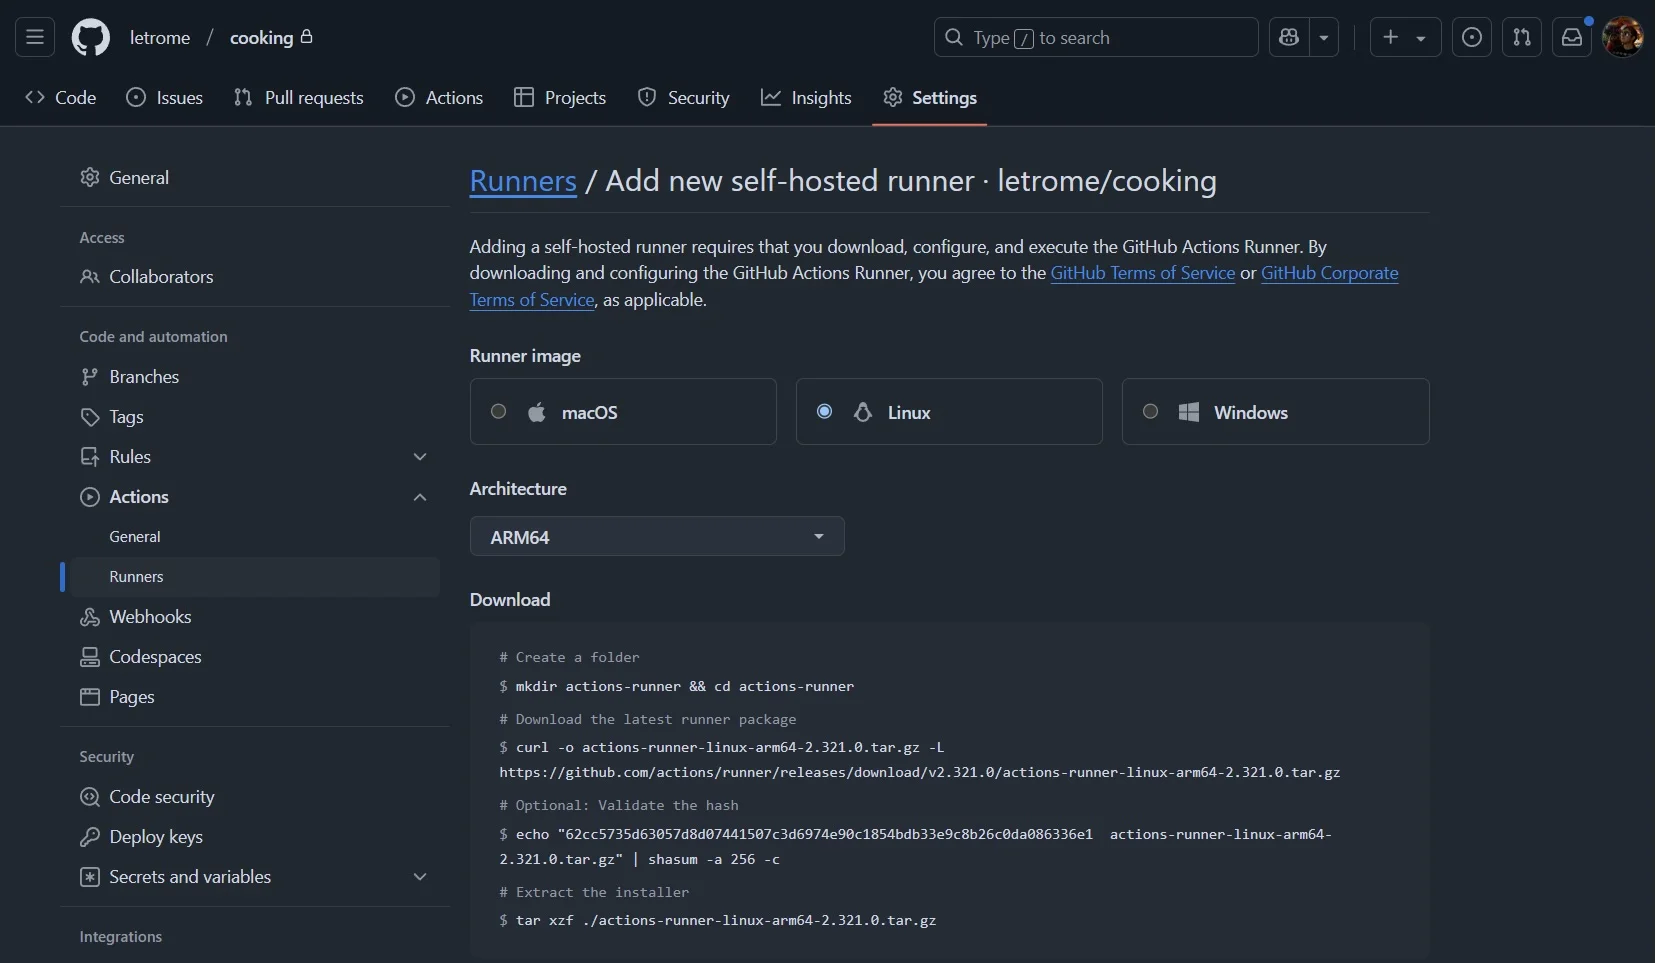 The “Add new self-hosted runner” page
When executing the config.sh script, press enter at each prompt to use the default values. Once done, you should have a runner up and running.
Back in your GitHub project settings, under Actions > Runners, you should now see your runner with the status Idle.
 The runner with status “Idle”
Note: By default, this runner does not start automatically on boot. To resolve this, I recommend installing it as a service using systemd. Check out this article for details.
Configure the GitHub Action workflow
We need to define the workflow. When a commit is pushed to the master branch, the Dockerfile runs, creates an image, and deploys it on the runner’s instance.
Create the file .github/workflows/deploy.yml. Thanks to our docker-compose.yaml file, this step is now very clean:
name: Deploy Hugo site to Docker

on:
  push:
    branches: ["master"]
  workflow_dispatch:

concurrency:
  group: "docker-deployment"
  cancel-in-progress: false

defaults:
  run:
    shell: bash

jobs:
  build-and-deploy:
    runs-on: self-hosted
    steps:
      - name: Checkout repository
        uses: actions/checkout@v4
        with:
          submodules: recursive
          fetch-depth: 0

      - name: Deploy with Docker Compose
        run: |
          docker compose up -d --build --force-recreate
The Checkout repository step uses submodules: recursive to ensure the theme files are retrieved. The final step simply asks Docker Compose to rebuild the image and recreate the container if changes are detected.
Test the configuration
Commit the deployment YAML file and push it to the master branch. In your GitHub repository, click on the Actions tab. You should see a running workflow.
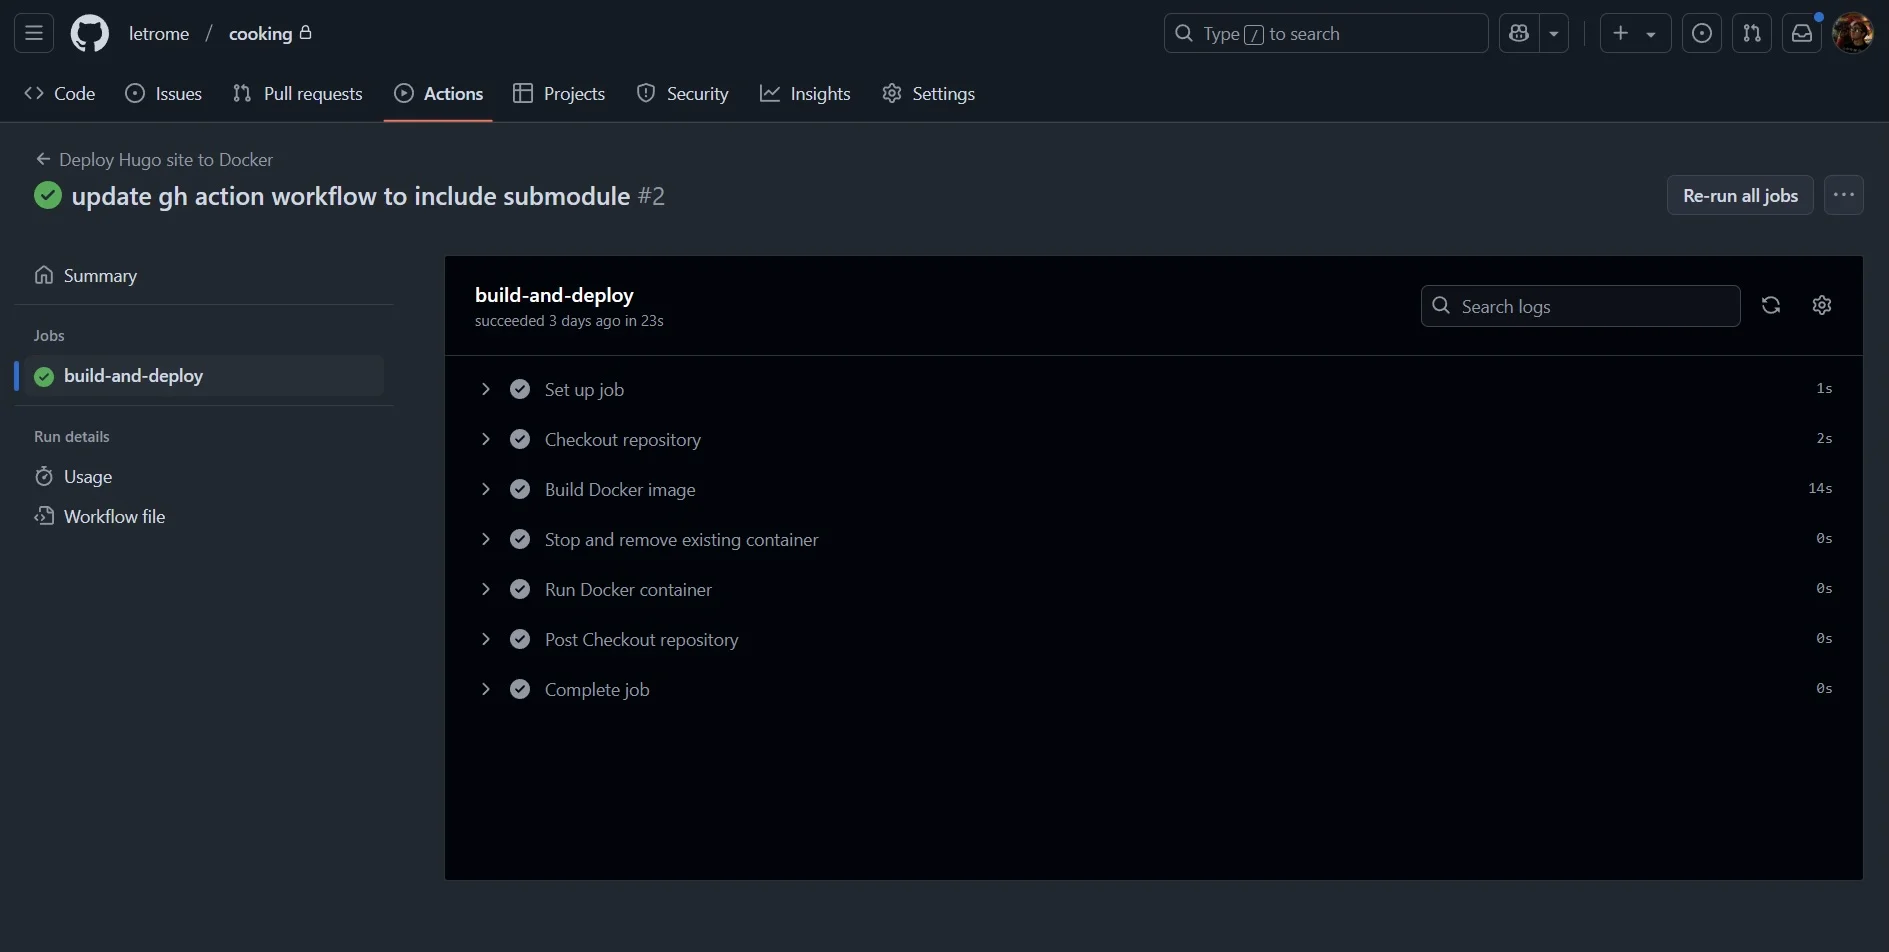 The GitHub Actions workflow running
Once it succeeds, open the URL corresponding to your instance’s IP (e.g., http://192.168.1.7:81). Your website should appear.
DNS and Routing
DNS
First, identify your router’s public IP address (using a site like nordvpn.com/what-is-my-ip). Then, add an A record to your DNS zone:
-
Name: The subdomain (e.g.,
cookingforcooking.yourdomain.com). -
Record type:
A -
Value: Your router’s public IP.
-
TTL:
14400(or default).
Visiting the URL should now return ERR_CONNECTION_REFUSED instead of ERR_NAME_NOT_RESOLVED. This is good progress.
Router Configuration
Access your router’s interface (often 192.168.1.1 or 192.168.1.254).
-
Static IP: Assign a static local IP to your server (Raspberry Pi) in the DHCP settings.
-
Port Forwarding: Forward external ports 80 and 443 (TCP) to the static IP of your server on ports 80 and 443 respectively.
Setup and Configure Traefik
Traefik is a powerful, cloud-native reverse proxy. We will use it to route external traffic to your container securely.
Create a specific docker-compose.yaml file for Traefik (or add it to your existing stack):
services:
  traefik:
    restart: always
    image: traefik:latest
    container_name: traefik
    ports:
      - "443:443"
      - "80:80"
    volumes:
      - ./traefik.yaml:/etc/traefik/traefik.yaml
      - /var/log/traefik.log:/var/log/traefik.log
      - ./acme.json:/etc/traefik/acme.json
      - ./conf:/etc/traefik/conf
traefik.yaml
Create the main configuration file traefik.yaml:
entryPoints:
  http:
    address: ":80"
  https:
    address: ":443"
    asDefault: true

log:
  level: INFO
  filePath: /var/log/traefik.log
  format: json

providers:
  file:
    directory: /etc/traefik/conf

certificatesResolvers:
  letsencrypt:
    acme:
      email: youremail@yourdomain.com
      storage: /etc/traefik/acme.json
      httpChallenge:
        entryPoint: http
File setup
Run the following commands to create the necessary files and set permissions:
sudo touch /var/log/traefik.log
touch acme.json
sudo chown $USER:$USER acme.json
sudo chmod 600 acme.json
mkdir conf
Note: The chmod 600 on acme.json is critical; Traefik will fail to start if the permissions are too open.
cooking.yaml (Dynamic Configuration)
Create conf/cooking.yaml to tell Traefik how to route traffic to your specific site:
http:
  routers:
    cooking:
      rule: "Host(`cooking.yourdomain.com`)"
      entryPoints:
        - "https"
      service: service-cooking
      tls:
        certResolver: letsencrypt

  services:
    service-cooking:
      loadBalancer:
        servers:
          - url: http://192.168.1.7:81
Make sure to update the domain name and the IP address in the url field.
Wrap up
Run docker compose up -d to start Traefik. Wait a few moments for the certificate to generate, and your site should be live and secured with HTTPS!
References
...main to port of your host (via reverse proxy). If you are unfamiliar with this, check out my [[previous guide on DNS and routing]]. Tip: Perform the setup wizard through...
...port de votre hôte (via reverse proxy). Si vous n'êtes pas familier avec cela, consultez mon [[guide précédent sur le DNS et le routage]]. Astuce : Effectuez l'assistant de...