
How to Self-Host Remark42 Comments with Docker & Hugo
When you embark on the exciting journey of creating a blog, you quickly face a crucial question: how to interact with your audience? This post addresses that very topic. I will explain how to integrate Remark42 as a comment system for a Hugo blog (using the Stack theme as an example). We will cover self-hosting it on a Raspberry Pi using Docker and Nginx.
Why choose Remark42?
In the early days of blogging, many of us—myself included—opted for Disqus. It’s incredibly easy to set up: create an account, paste a snippet, and you’re live in under an hour.
However, when I started looking into Content Security Policy (CSP) headers and privacy, I realized that Disqus wasn’t exactly treating user data with the respect I hoped for. Since data privacy is a topic I pay close attention to, I started looking for alternatives. My criteria were strict:
-
Open-source solution.
-
Self-hosted (to maintain control over the data).
-
Actively maintained with regular updates.
-
Compatible with my Hugo theme.
I finally settled on Remark42. According to their official website, Remark42 focuses on privacy: no tracking, no third-party analytics, and all sensitive data is encrypted. It offers multiple social login options (Google, Twitter, GitHub, etc.), email authentication, and even anonymous commenting. Best of all, it is “fully dockerized and can be deployed in a single command.”
Server-side Setup with Docker Compose
For this setup, we are hosting Remark42 on a Raspberry Pi via Docker, using Nginx as a reverse proxy with an SSL certificate generated by Let’s Encrypt.
From the Remark42 installation page, you can retrieve the basic docker-compose.yml. Below is a merged configuration example, assuming you might be running other services (like Nginx) on the same instance.
version: "3"

services:
  # ... other services ...

  remark42:
    build: .
    image: umputun/remark42:latest
    container_name: "remark42"
    restart: always
    logging:
      driver: json-file
      options:
        max-size: "10m"
        max-file: "5"
    environment:
      - REMARK_URL=${remark-url}
      - SITE=${site}
      - SECRET=${secret}
      - AUTH_ANON=${auth-anon}
      - AUTH_SAME_SITE=none
      - ALLOWED_HOSTS=${website-url}
      - AUTH_GOOGLE_CID=${auth-google-cid}
      - AUTH_GOOGLE_CSEC=${auth-google-csec}
      - AUTH_GITHUB_CID=${auth-github-cid}
      - AUTH_GITHUB_CSEC=${auth-github-csec}
      - AUTH_EMAIL_ENABLE=${auth-email-enable}
      - ADMIN_SHARED_ID=${admin-shared-id}
      - NOTIFY_ADMINS=email
      - ADMIN_SHARED_EMAIL=${admin-shared-email}
      - SMTP_HOST=${smtp-host}
      - SMTP_PORT=${smtp-port}
      - SMTP_TLS=${smtp-tls}
      - SMTP_USERNAME=${smtp-username}
      - SMTP_PASSWORD=${smtp-password}
      - AUTH_EMAIL_FROM=${auth-email-from}
      - NOTIFY_EMAIL_FROM=${notify-email-from}
    volumes:
      - ./remark42:/srv/var

  nginx:
    image: nginx:latest
    container_name: "nginx"
    restart: always
    volumes:
      - ./nginx/nginx.conf:/etc/nginx/conf.d/default.conf:z,ro
      - /etc/letsencrypt/:/etc/letsencrypt/:z,ro
    ports:
      - 8080:80
      - 8443:443
Let’s break down the environment variables (${value}) and how to configure them.
Docker Configuration Details
-
${remark-url}: The domain pointing to your Remark42 instance. You should define a subdomain (e.g.,comments.your-blog.com) and add a DNS entry routing traffic to your Raspberry Pi. This must be publicly accessible for the frontend to reach the backend and for OAuth providers (Google/GitHub) to work. -
${website-url}: The URL of the blog where comments will be displayed (e.g.,https://www.your-blog.com). -
${site}: An identifier for your website. If you only host comments for one site,defaultworks fine. -
${secret}: Used to sign JSON Web Tokens (JWT). This must be a long, random, high-entropy string.
Pro Tip: You can generate a robust secret directly in your terminal:
Bash
tr -dc 'A-Za-z0-9!?%=' < /dev/urandom | head -c 30-
${admin-shared-id}: A comma-separated list of admin user IDs.- How to find your ID: Log in to Remark42 on your site. Click your profile picture to open the sidebar. Copy the long string under your name (it starts with the provider, e.g.,
github_...).
- How to find your ID: Log in to Remark42 on your site. Click your profile picture to open the sidebar. Copy the long string under your name (it starts with the provider, e.g.,
Email Notifications Setup
To receive email alerts when new comments are posted:
-
${admin-shared-email}: The administrator’s email address. -
${smtp-host}: Your email provider’s SMTP address (e.g.,smtp.gmail.comorsmtp-mail.outlook.com). -
${smtp-port}: Usually587or465. Check your provider’s docs or this Cloudflare article. -
${smtp-tls}: Set totrue(standard for most modern providers). -
${smtp-username}/${smtp-password}: Your credentials for the SMTP account. -
${notify-email-from}: The email address that will appear as the “Sender” of the notification.
Authentication Methods
Remark42 supports many providers (Google, Twitter, Facebook, Microsoft, GitHub, Yandex, etc.). Below are the settings for the ones I used.
-
${auth-anon}: Set totrueto allow anonymous comments,falseotherwise. -
${auth-email-enable}: Set totrueto allow login via email magic links. If enabled, you must configure the SMTP settings above and define${auth-email-from}.
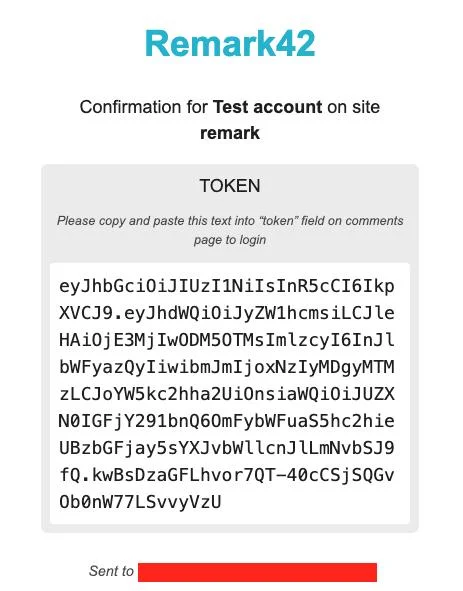 Example of email containing a token sent during the connection process
Configuring OAuth Providers
While anonymous and email login are great, social login reduces friction for users.
GitHub Authentication
This is the easiest to configure.
-
Log in to GitHub and go to Settings > Developer Settings > OAuth Apps > New OAuth App.
-
Application Name: “Remark42 Comments” (or similar).
-
Homepage URL: Your blog URL (e.g.,
https://your-blog.com). -
Authorization callback URL: Your Remark42 domain +
/auth/github/callback(e.g.,https://comments.your-blog.com/auth/github/callback). -
Register the application.
-
Copy the Client ID into
${auth-github-cid}. -
Generate a Client Secret and paste it into
${auth-github-csec}.
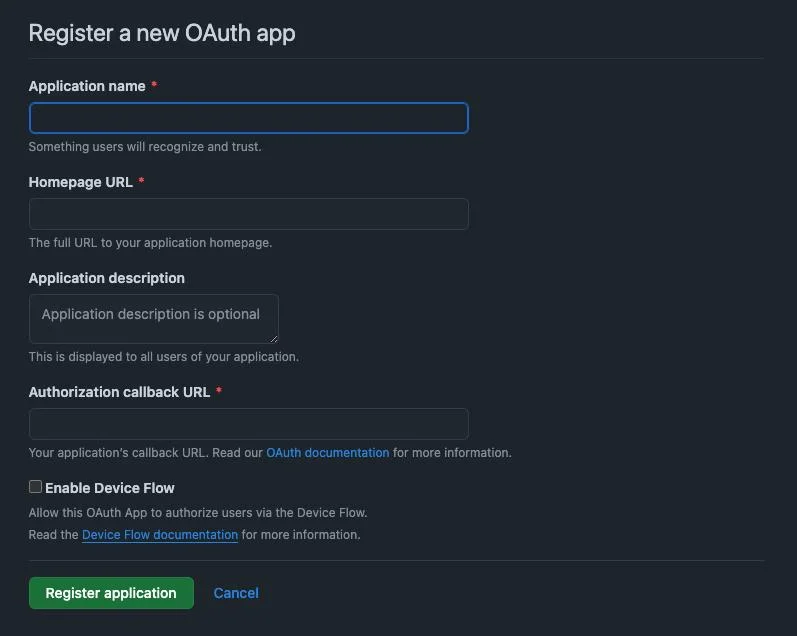
The creation form for an OAuth App on GitHub
Google Authentication
Disclaimer: This process is more complex and may require verifying your domain and adding a privacy policy to your site.
-
Go to the Google Cloud Console.
-
Create a New Project.
-
Navigate to APIs & Services > OAuth consent screen.
-
Select External and fill in the required details (App name, Support email, Authorized domains).
- Note: You don’t need to add scopes for basic login.
-
Go to Credentials > Create Credentials > OAuth client ID.
-
Application type: Web application.
-
Authorized JavaScript origins: Your blog URL.
-
Authorized redirect URIs: Your Remark42 domain +
/auth/google/callback.
-
-
Copy the Client ID and Secret into your docker-compose file.
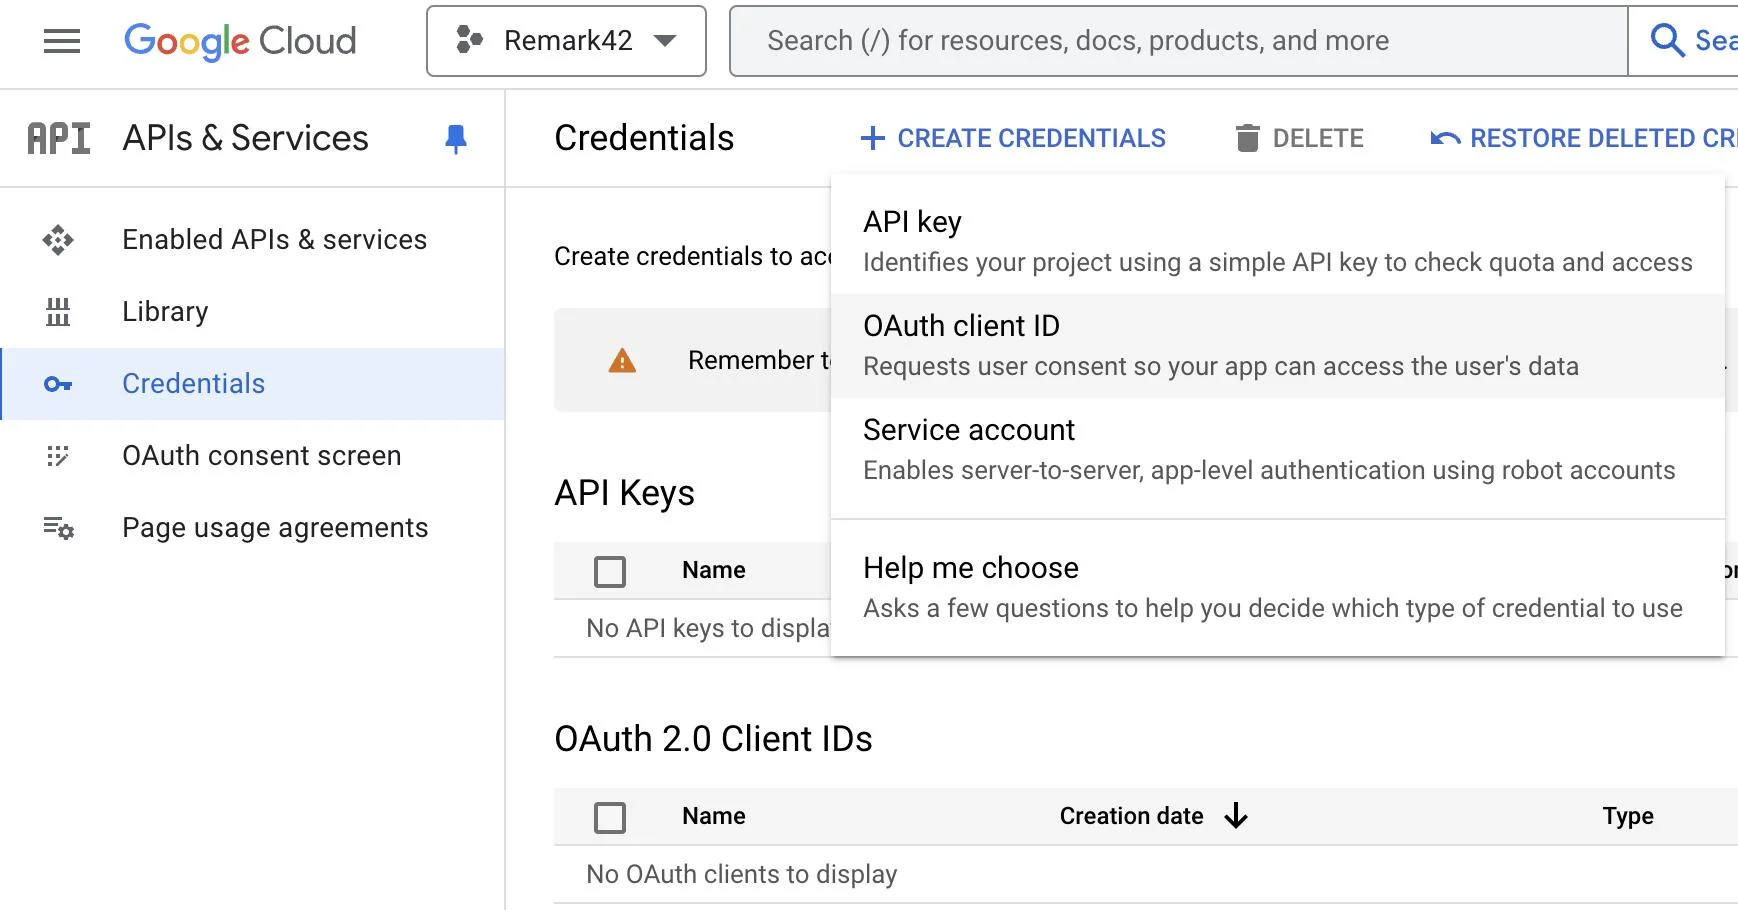 The OAuth client ID menu
Important: You must click “PUBLISH APP” on the OAuth consent screen. Google may require a review process, which can take weeks. Ensure your site has a visible Privacy Policy. Conveniently, Remark42 hosts a default policy at ${remark-url}/web/privacy.html.
Integrating Remark42 into Hugo
Once the backend is running, integrating it into Hugo (specifically the hugo-theme-stack) is straightforward. Edit your params.toml:
[comments.remark42]
host = "https://comments.your-blog.com" # Your ${remark-url}
site = "default" # Your ${site} value
locale = "en" # or "fr", etc.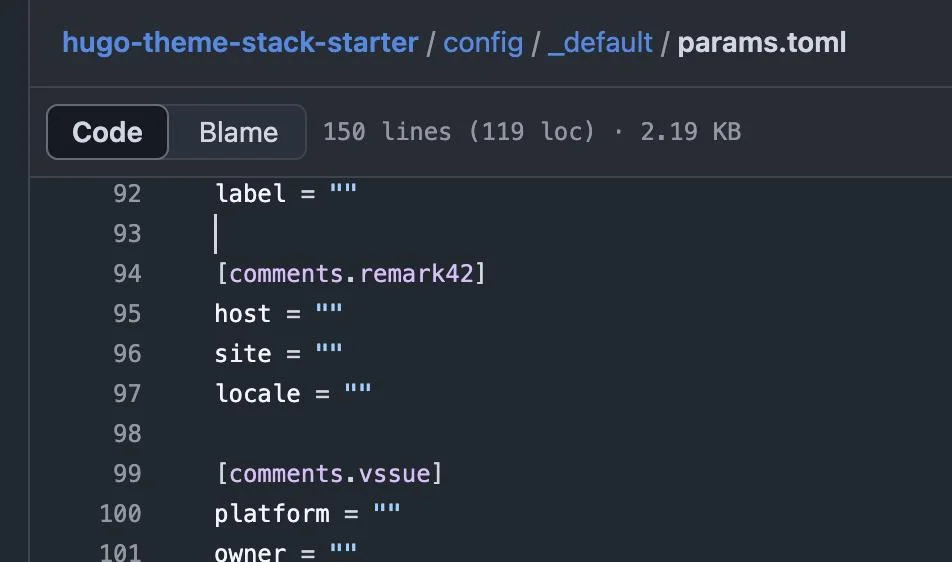 The [comments.remark42] section on params.toml
Deploy your site, and you should see the comment section appear!
Final Advice
Self-hosting a comment system is rewarding but has a learning curve. I recommend starting small: get the Docker container running with just Anonymous or Email authentication first. Once that works reliably, tackle the complexity of Google or GitHub OAuth. You don’t need every feature enabled on day one—build it up iteratively.