
Automate GitHub SSH Key Setup on Raspberry Pi with gh CLI
I’ve just received a new Raspberry Pi 🎉
With each new computer comes a delightful moment of configuration. Among these configurations is setting up access to my private GitHub repositories.
In my case, I need this to check out a repository containing a welcome script. This script displays, upon SSH connection to the instance, the instance name, information like the number of users currently connected, uptime, IP address, and finally, a customized prompt and color scheme. If you’re interested in this project, I’ve made it publicly accessible here. Beyond that, I also need access to private repositories that contain default configuration templates for Portainer, Prometheus, Loki, Watchtower, and more.
In this short article, I’ll detail the most efficient way to configure this remotely via SSH: using the GitHub CLI to handle both authentication and SSH keys in one go.
The “All-in-One” Method via GitHub CLI
First, open an SSH connection to the instance you want to configure.
Once connected, install GitHub CLI (see the official website) by executing these commands:
sudo apt update
sudo apt install -y gh
We’ll then use GitHub CLI to log in. The beauty of gh is that it handles SSH key management automatically.
Run the following command:
gh auth loginThis command triggers an interactive setup. Follow these specific steps to configure everything at once:
- Account: Select
GitHub.com.
 gh auth login prompt asking for what account to log into
- Protocol: Select
SSH.
 gh auth login prompt asking for protocol, selecting SSH
Note: You can select HTTPS if you prefer, but you will lose the automatic key generation feature and might need to set up a credential helper later.
-
SSH Keys: The tool will check your
.sshfolder.-
If no key exists: It will ask “Generate a new SSH key to add to your GitHub account?”. Select Yes. You can leave the passphrase blank (press Enter) for automated scripts. Finally, select Yes to upload the new public key.
-
If a key already exists: It will ask “Upload your SSH public key to your GitHub account?” and list your existing key (e.g.,
id_ed25519.pub). Select it and press Enter.
-

💡 Tip: Want a different key? If the tool detects an existing key but you prefer to create a brand new one for this specific device, select Skip. Finish the login process, generate your new key manually (ssh-keygen), and then run gh ssh-key add path/to/key.pub to upload it instantly.
- Authentication Method: Select
Paste an authentication token.
Note: We use the token method because the browser-based login often fails or hangs on headless devices (SSH-only).
 gh auth login prompt asking for which authentication method to use
The CLI will provide a link to create a token and a list of required scopes.
Open the provided link in your computer’s browser.
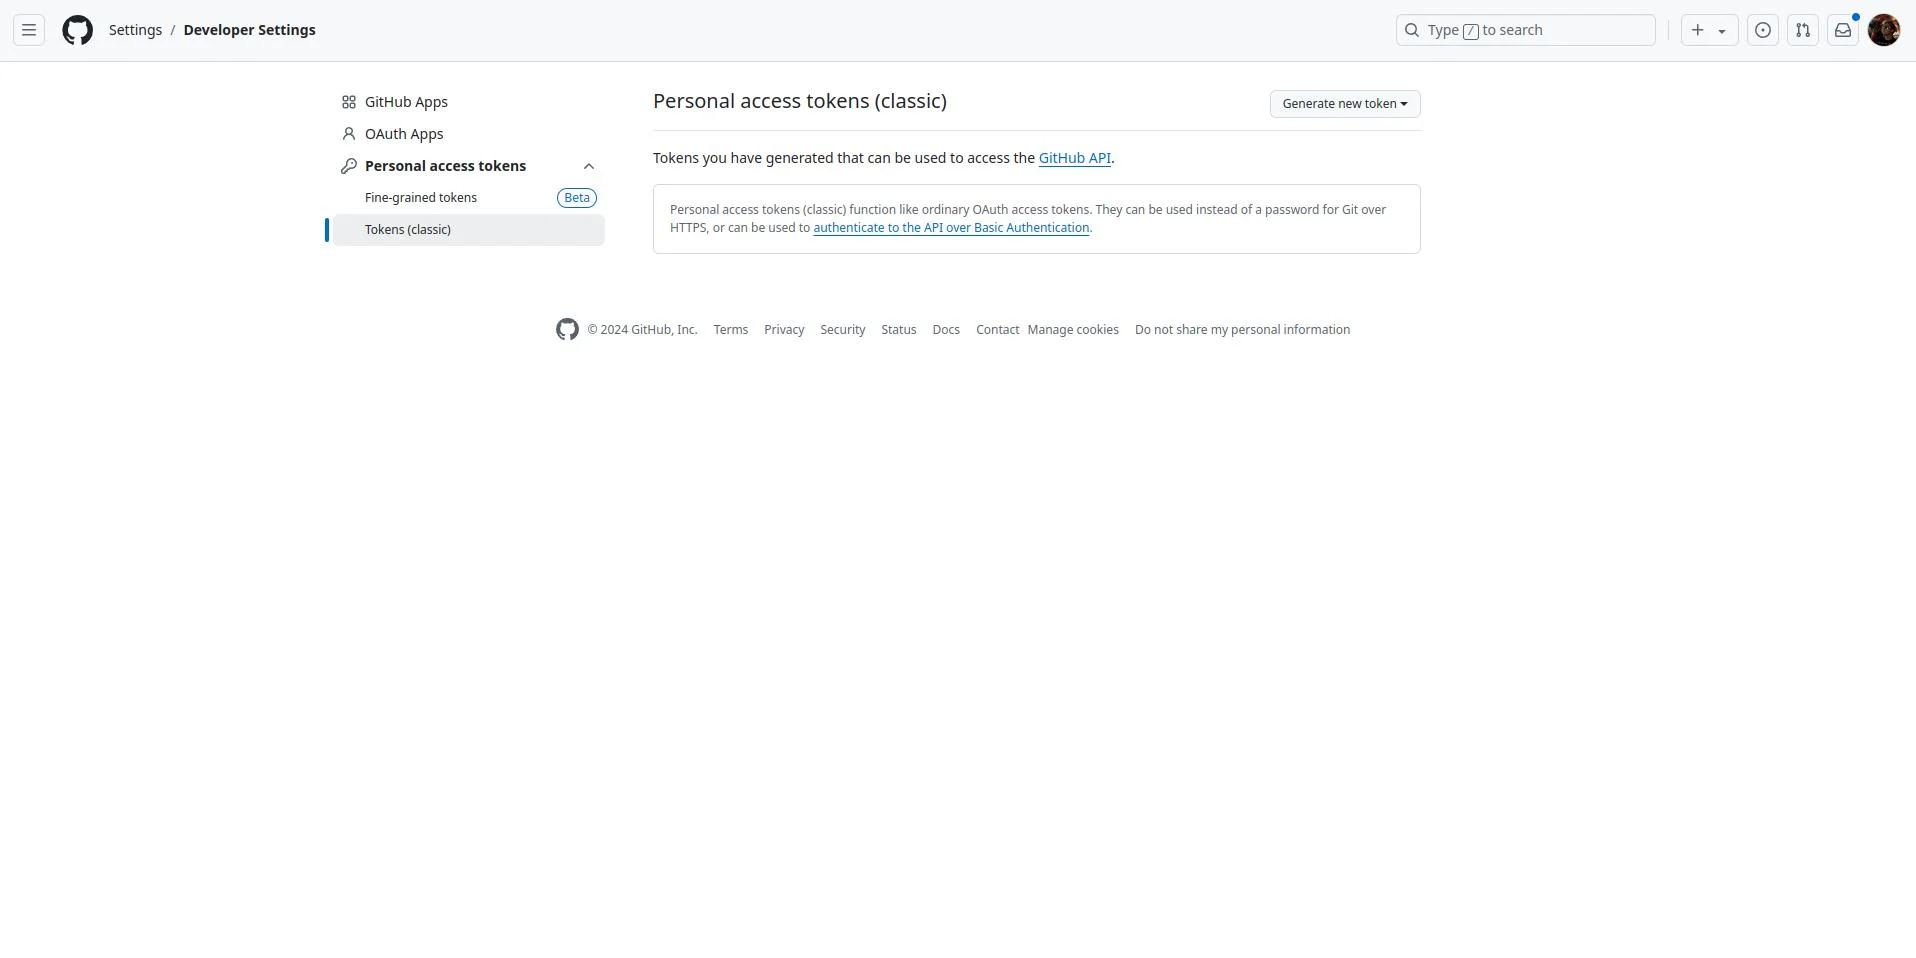 the page containing the tokens on the user’s GitHub account
Click on the “Generate new token” dropdown menu in the top-right corner, then select “Generate new token (classic)”.
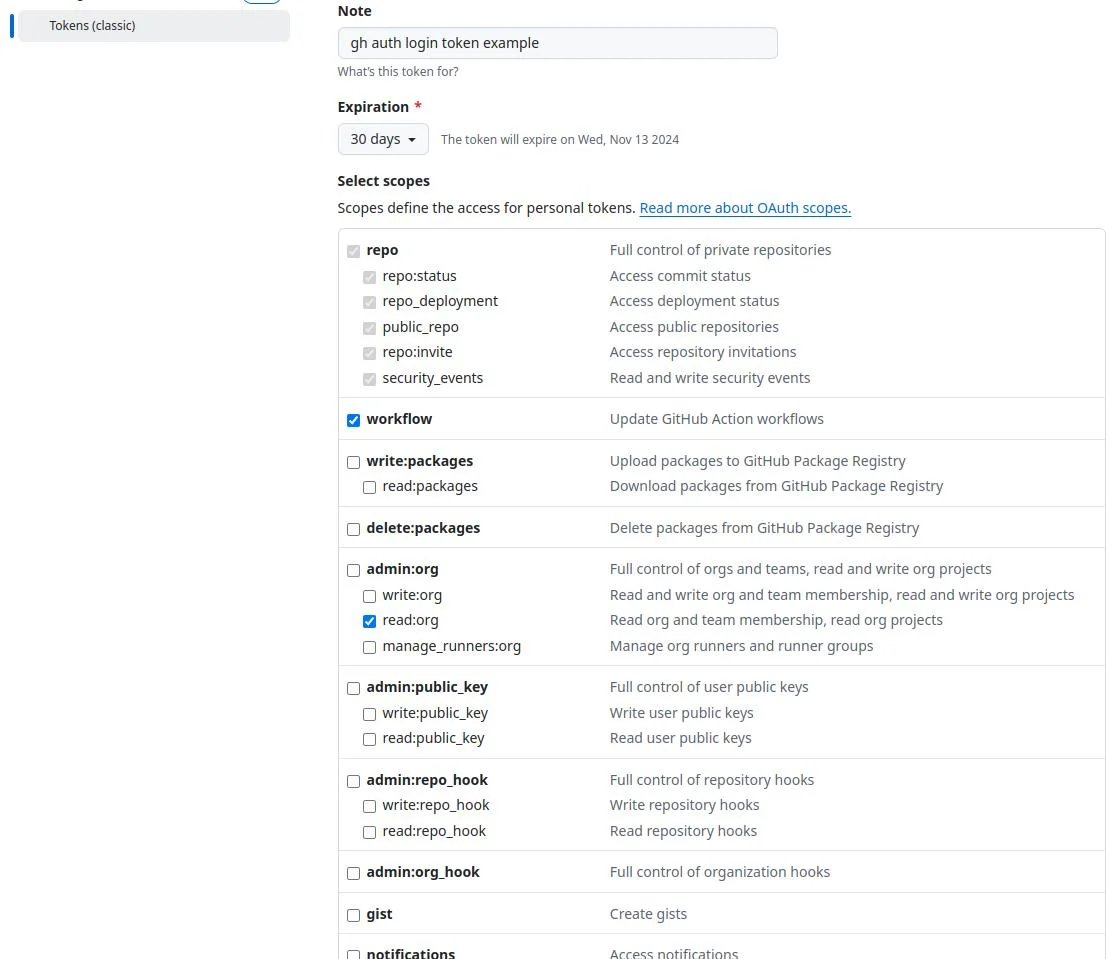 the creation form to generate a new token (classic)
Name your token (e.g., “Raspberry Pi Setup”), set an expiration date, and select the required scopes: repo, read:org, and workflow.
Important: Ensure you also check admin:public_key (or write:public_key). This permission is required for the CLI to automatically upload your SSH key to your account.
Click “Generate token”. Copy the token immediately.
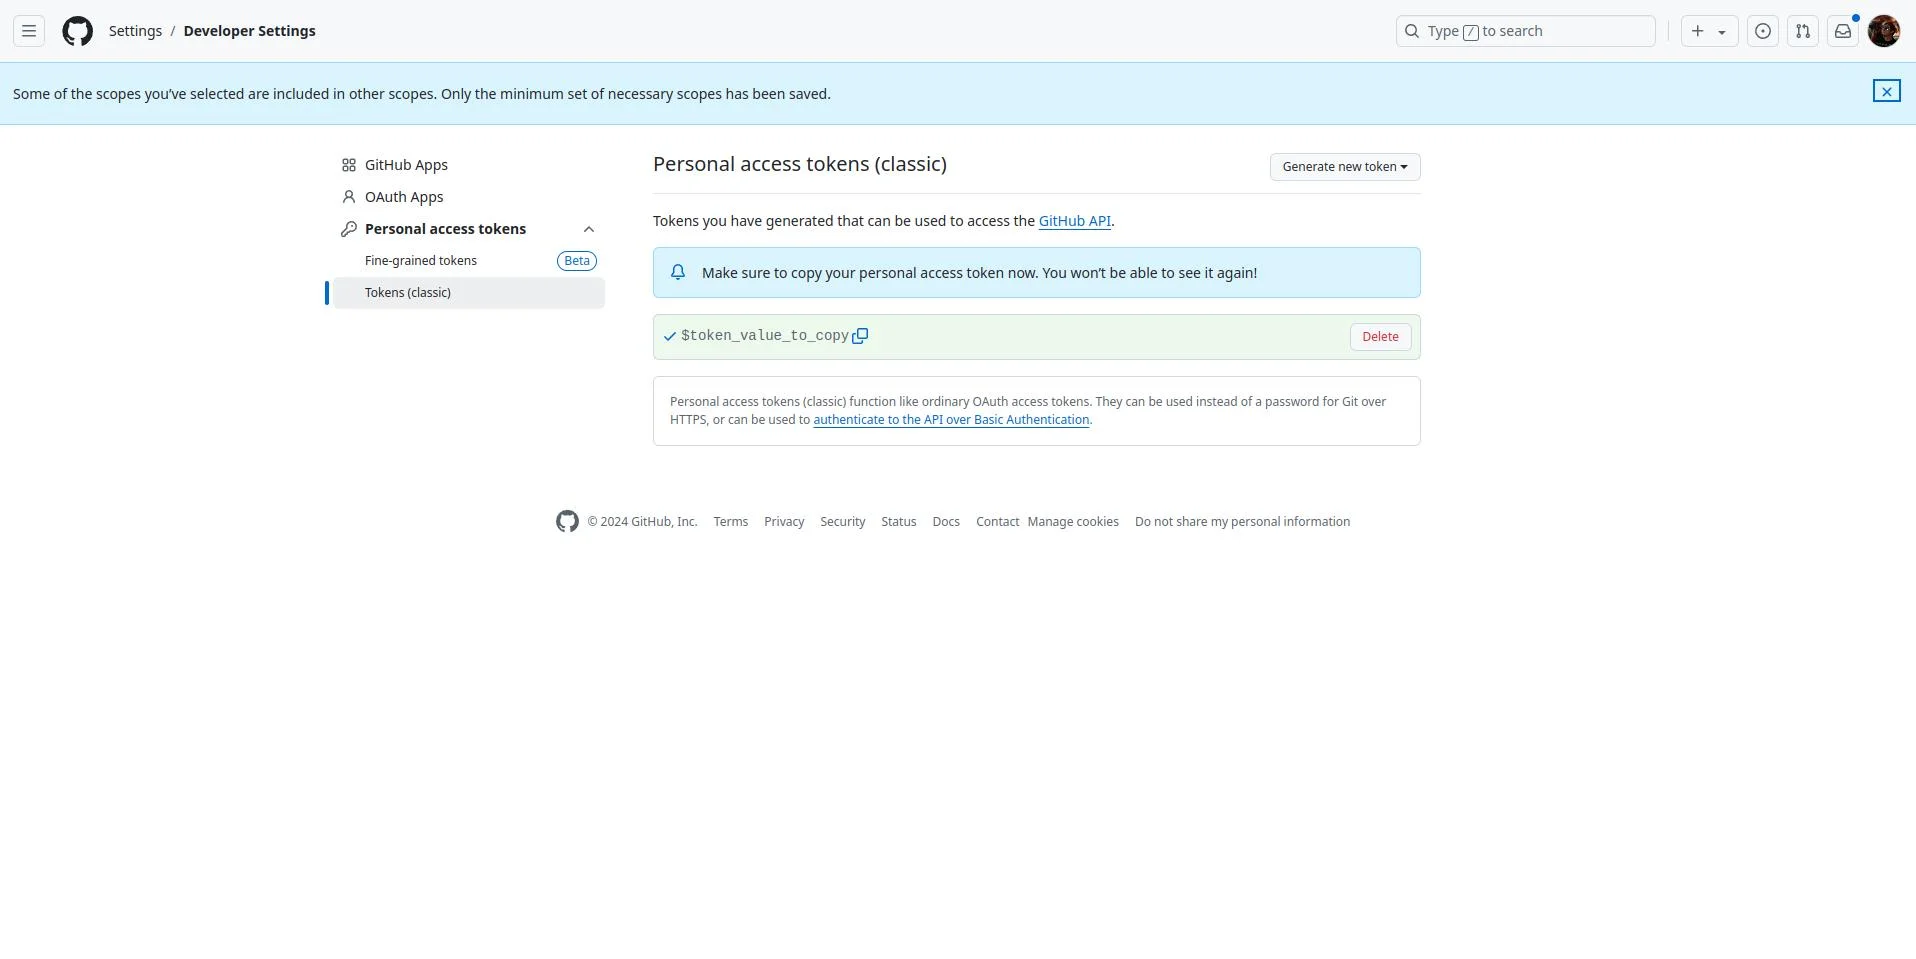 newly created token
Return to your terminal, paste the token, and press Enter.
That’s it! You are now logged in, and your Raspberry Pi has a valid SSH key authorized on your GitHub account. No manual copy-pasting required.
Test that everything works
To perform our test, let’s create a private repository. From the GitHub homepage, click the “New” button. Name it test-RPI-connection and select Private.
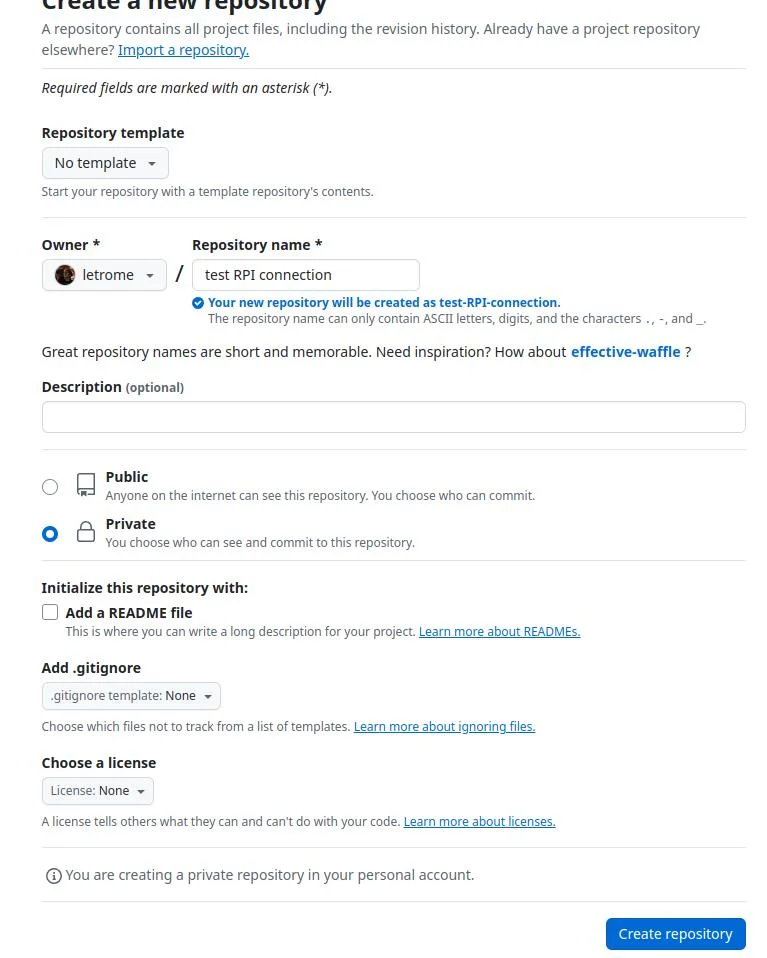 creation of a new repository
On the repository page, click the green Code button, make sure the SSH tab is active, and copy the URL (it starts with git@github.com...).
Back in your terminal:
git clone git@github.com:your_username/test-RPI-connection.gitIf your configuration is successful, you should see a message saying Cloning into 'test-RPI-connection'... (and a warning that it’s empty).
Congratulations! Your Raspberry Pi is now fully integrated with your private GitHub ecosystem.